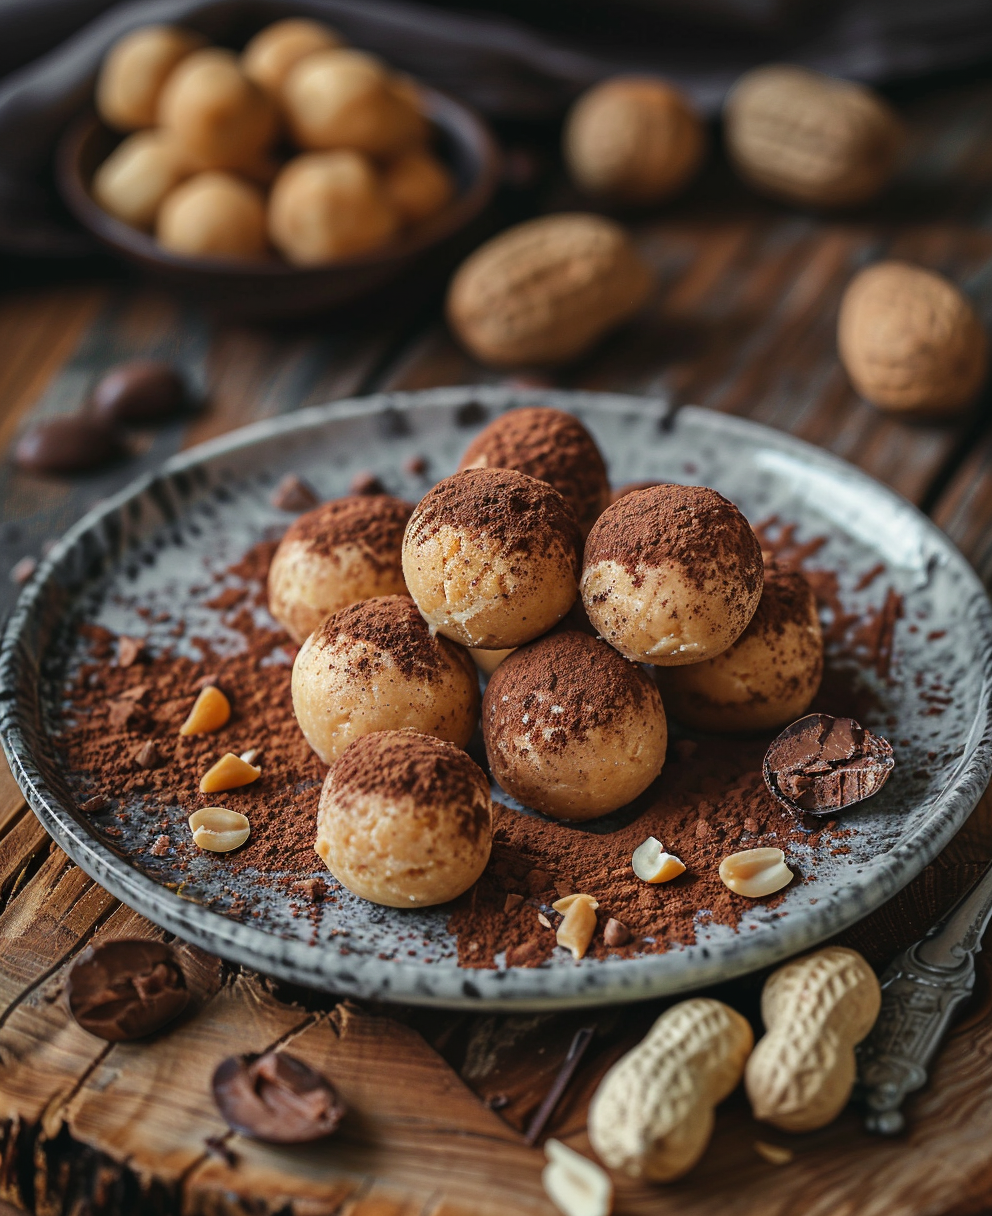
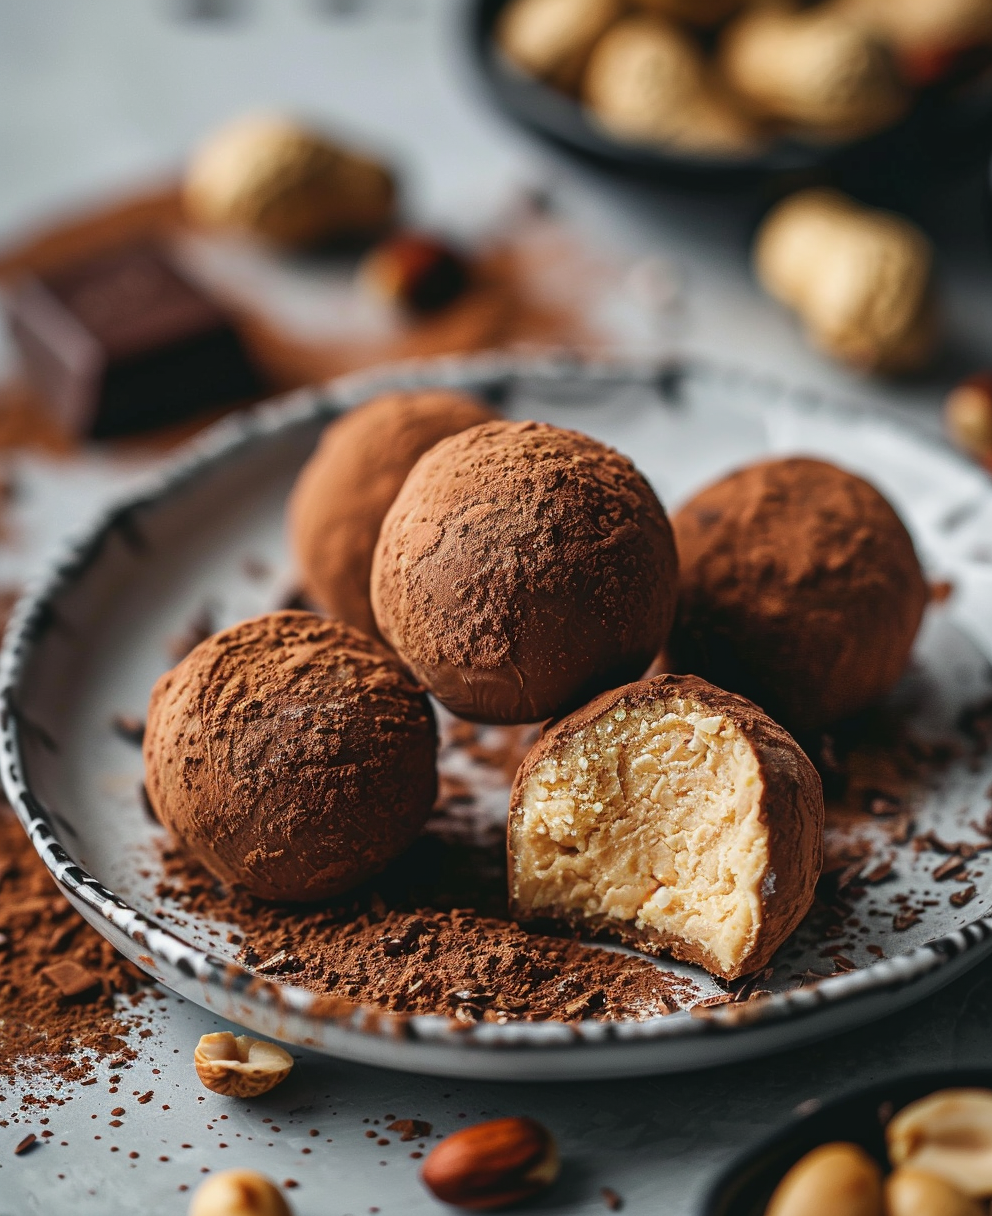
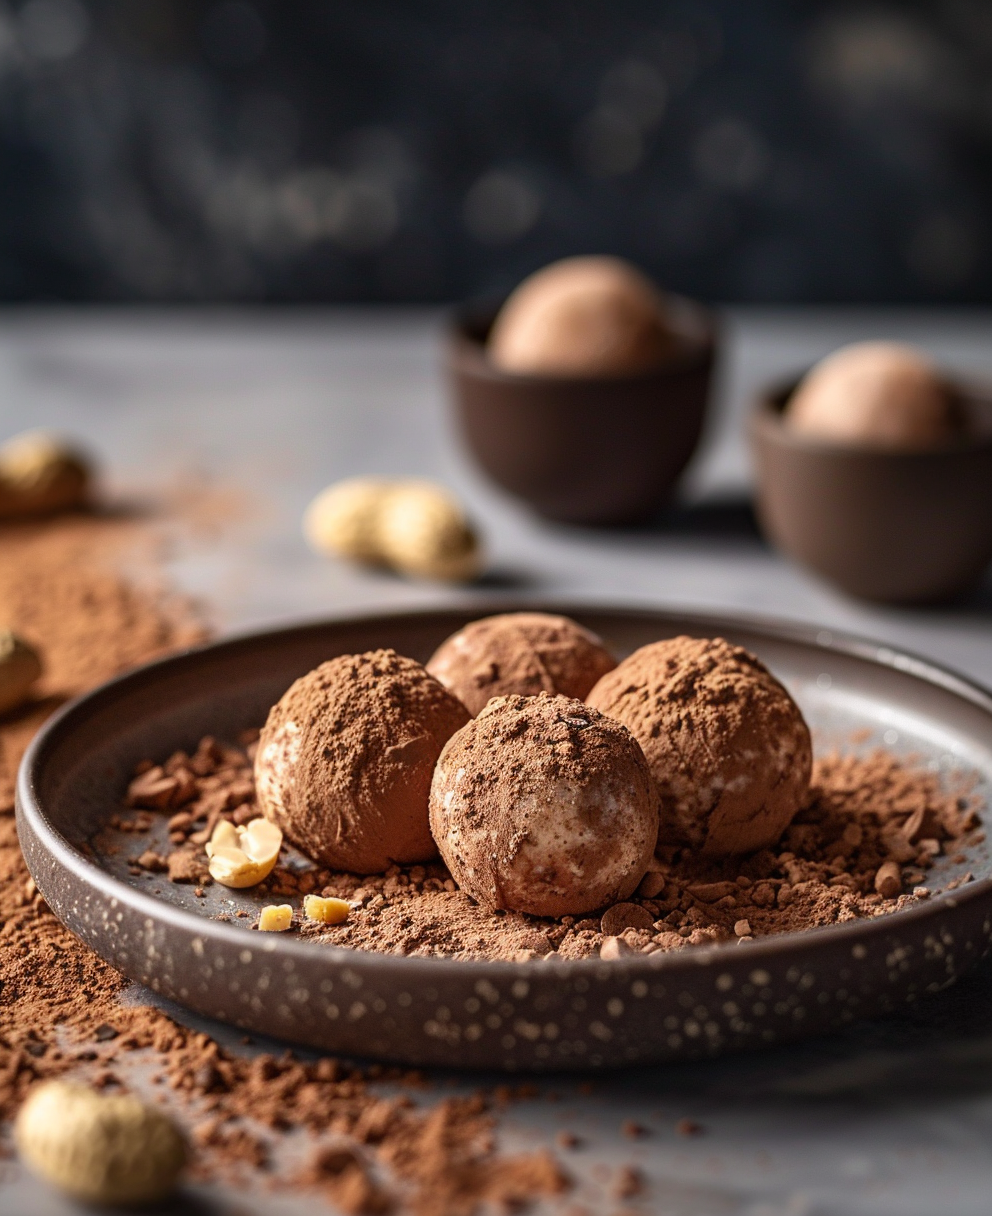
Why These No Bake Peanut Butter Cheesecake Balls Are a Game-Changer
Picture this: It’s a hot summer afternoon, and the last thing you want to do is turn on the oven. That’s exactly when I discovered these no bake peanut butter cheesecake balls. They’re creamy, dreamy, and packed with flavor—all without breaking a sweat. The first time I made them, my kids literally cheered. Yes, cheered! And let me tell you, that doesn’t happen often in my house unless chocolate is involved.
A Little History Behind These Sweet Treats
No-bake desserts have been around for ages, but they gained popularity in the mid-20th century when busy homemakers needed quick solutions. These no bake peanut butter cheesecake balls are a modern twist on classic no-bake cookies. I like to think of them as the love child of cheesecake and peanut butter cups. The best part? You don’t need fancy tools or hours of prep time. Just mix, roll, chill, and enjoy!
Why You’ll Love This Recipe
These little bites are pure magic. First, they’re super easy to make—even if you’re not a baking pro. Second, they combine two of life’s greatest pleasures: peanut butter and cheesecake. And third, they’re portable! Whether you’re packing them for a picnic or serving them at a party, they’re always a hit. Plus, they’re no-bake, which means less mess and more time to relax.
Perfect Occasions for These Cheesecake Balls
Need a dessert for a potluck? Done. Want something sweet for movie night? Check. Hosting a holiday gathering? These no bake peanut butter cheesecake balls are perfect. They’re also great for school bake sales, office parties, or just because you’re craving something indulgent. Trust me, they’ll disappear faster than you can say “peanut butter.”
Ingredients
- 1 cup creamy peanut butter
- 8 oz cream cheese, softened
- 1/2 cup unsalted butter, melted
- 2 cups powdered sugar
- 1 teaspoon vanilla extract
- 1 cup graham cracker crumbs
- 1/2 cup mini chocolate chips
- Optional: extra chocolate for drizzling
Substitution Options
- Use almond butter or sunflower seed butter instead of peanut butter for a nut-free option.
- Swap graham cracker crumbs for crushed cookies like Oreos or vanilla wafers.
- Replace mini chocolate chips with white chocolate chips or chopped nuts for variety.
Preparation Section
Step 1: Mix the Base
Start by combining the peanut butter, cream cheese, and melted butter in a large mixing bowl. Use a hand mixer to blend until smooth and creamy. This is where the magic begins! The mixture will be soft and slightly sticky, with a rich golden color that smells absolutely divine. Pro tip: Make sure your cream cheese is softened to avoid lumps.
Step 2: Add the Sweetness
Gradually add the powdered sugar and vanilla extract to the mixture. Mix on low speed at first to prevent a sugar cloud from taking over your kitchen (trust me, it happens). Once everything is incorporated, increase the speed and whip until the dough is thick and holds together. At this point, the aroma of vanilla and peanut butter will make your mouth water.
Step 3: Fold in the Extras
Gently fold in the graham cracker crumbs and mini chocolate chips. This step gives the cheesecake balls their signature texture and crunch. Be careful not to overmix—you want those chocolate chips to stay intact. Chef’s tip: If the dough feels too sticky, chill it in the fridge for 10 minutes before rolling.
Step 4: Roll and Chill
Scoop out small portions of the dough and roll them into bite-sized balls. Place them on a parchment-lined tray and pop them in the fridge for at least 30 minutes. This chilling step firms up the balls so they’re easier to handle. Bonus: The anticipation makes them taste even better!
Timing
Here’s the breakdown: Prep time is about 15 minutes, chilling time is 30 minutes, and there’s no cooking required. Total time? Just under an hour. How’s that for efficiency?
Chef’s Secret
To take these no bake peanut butter cheesecake balls to the next level, drizzle melted chocolate over the top before serving. A light sprinkle of sea salt adds a gourmet touch that balances the sweetness perfectly.
Extra Info
Did you know peanut butter was invented in the early 1900s as a protein-packed food for people who couldn’t chew meat? Fast forward to today, and we’re using it to create decadent desserts like these cheesecake balls. Funny how things evolve, isn’t it?
Necessary Equipment
- Large mixing bowl
- Hand mixer or stand mixer
- Parchment paper
- Baking sheet
Storage
These cheesecake balls are best stored in the fridge. Keep them in an airtight container to maintain freshness. They’ll last up to a week, but good luck making them last that long! For longer storage, you can freeze them for up to three months. Just thaw them in the fridge before serving.
If you’re freezing, place the balls on a baking sheet lined with parchment paper and freeze until solid. Then transfer them to a freezer-safe bag. This prevents them from sticking together.
When reheating frozen balls, let them sit at room temperature for 10–15 minutes. This brings back their creamy texture without losing the crunch.
Tips and Advice
For perfectly round balls, wet your hands slightly before rolling. This keeps the dough from sticking and gives you a smooth finish. Another tip: Use a cookie scoop to ensure all the balls are the same size. Consistency is key when you’re aiming for perfection.
Presentation Tips
- Serve them on a tiered dessert stand for a fancy look.
- Arrange them in mini cupcake liners for individual servings.
- Drizzle with chocolate and garnish with chopped peanuts for a decorative touch.
Healthier Alternative Recipes
Want to lighten things up? Here are six variations:
- Low-Sugar Version: Replace powdered sugar with a sugar substitute like stevia or monk fruit.
- Gluten-Free Option: Use gluten-free graham crackers or crushed gluten-free cookies.
- Dairy-Free Delight: Swap cream cheese for vegan cream cheese and use dairy-free chocolate chips.
- Protein-Packed Balls: Add a scoop of vanilla protein powder to the mix for an extra boost.
- Coconut Lover’s Dream: Roll the balls in shredded coconut instead of graham cracker crumbs.
- Fruit-Infused Twist: Mix in dried cranberries or cherries for a fruity kick.
Common Mistakes to Avoid
Mistake 1: Skipping the Chilling Step
Rushing through the process and skipping the chilling step is a big no-no. Without chilling, the balls will be too soft to hold their shape. Always give them at least 30 minutes in the fridge. Pro tip: If you’re short on time, pop them in the freezer for 10–15 minutes instead.
Mistake 2: Overloading with Mix-Ins
It’s tempting to go overboard with chocolate chips or nuts, but too many mix-ins can make the dough fall apart. Stick to the recommended amounts for the perfect balance of flavor and texture.
Mistake 3: Using Cold Cream Cheese
Using cold cream cheese makes it difficult to achieve a smooth, lump-free mixture. Always soften your cream cheese beforehand. You can microwave it for 10–15 seconds if you forget to take it out ahead of time.
FAQ
Can I use crunchy peanut butter?
Absolutely! Crunchy peanut butter adds a nice texture contrast to the creamy cheesecake filling. Just keep in mind that the balls might be a bit harder to roll smoothly.
How long do these cheesecake balls last?
Stored in the fridge, they’ll stay fresh for up to a week. In the freezer, they can last up to three months. Just make sure to seal them tightly to avoid freezer burn.
Are these gluten-free?
Not inherently, but you can easily make them gluten-free by using gluten-free graham crackers or cookies. Double-check all your ingredients to ensure they’re certified gluten-free.
Can I make these ahead of time?
Yes! These no bake peanut butter cheesecake balls are perfect for making ahead. Prepare them a day or two in advance and store them in the fridge until you’re ready to serve.
What’s the best way to melt chocolate for drizzling?
Use a microwave-safe bowl and heat the chocolate in 30-second intervals, stirring between each interval. This ensures even melting without burning. Alternatively, use a double boiler for precise control.
Can I add other flavors to the mix?
Of course! Try adding a pinch of cinnamon, espresso powder, or almond extract for a unique twist. Just be careful not to overpower the classic peanut butter and cheesecake flavors.
Do I have to use graham cracker crumbs?
Nope! Feel free to experiment with crushed cookies, pretzels, or even cereal for a fun variation. Each option brings its own texture and flavor profile.
Are these suitable for kids?
They sure are! Kids love the combination of peanut butter and chocolate. Just make sure there are no allergies to peanuts or dairy before serving.
Can I use natural peanut butter?
Yes, but stir it well before measuring. Natural peanut butter tends to separate, so blending it ensures the right consistency.
What if I don’t have a hand mixer?
No problem! You can mix the ingredients by hand using a sturdy spatula or wooden spoon. It might take a bit more elbow grease, but it’s totally doable.
Final Thoughts
There you have it—everything you need to know about making no bake peanut butter cheesecake balls. Whether you’re a seasoned baker or a newbie in the kitchen, this recipe is foolproof and fun. So grab your ingredients, crank up your favorite playlist, and get ready to impress everyone with these irresistible treats. Happy baking—or should I say, no-baking!
No Bake Peanut Butter Cheesecake Balls: Irresistibly Easy Treats
Why These No Bake Peanut Butter Cheesecake Balls Are a Game-Changer
Picture this: It’s a hot summer afternoon, and the last thing you want to do is turn on the oven. That’s exactly when I discovered these no bake peanut butter cheesecake balls. They’re creamy, dreamy, and packed with flavor—all without breaking a sweat. The first time I made them, my kids literally cheered. Yes, cheered! And let me tell you, that doesn’t happen often in my house unless chocolate is involved.A Little History Behind These Sweet Treats
No-bake desserts have been around for ages, but they gained popularity in the mid-20th century when busy homemakers needed quick solutions. These no bake peanut butter cheesecake balls are a modern twist on classic no-bake cookies. I like to think of them as the love child of cheesecake and peanut butter cups. The best part? You don’t need fancy tools or hours of prep time. Just mix, roll, chill, and enjoy!Why You’ll Love This Recipe
These little bites are pure magic. First, they’re super easy to make—even if you’re not a baking pro. Second, they combine two of life’s greatest pleasures: peanut butter and cheesecake. And third, they’re portable! Whether you’re packing them for a picnic or serving them at a party, they’re always a hit. Plus, they’re no-bake, which means less mess and more time to relax.Perfect Occasions for These Cheesecake Balls
Need a dessert for a potluck? Done. Want something sweet for movie night? Check. Hosting a holiday gathering? These no bake peanut butter cheesecake balls are perfect. They’re also great for school bake sales, office parties, or just because you’re craving something indulgent. Trust me, they’ll disappear faster than you can say “peanut butter.”Ingredients
- 1 cup creamy peanut butter
- 8 oz cream cheese, softened
- 1/2 cup unsalted butter, melted
- 2 cups powdered sugar
- 1 teaspoon vanilla extract
- 1 cup graham cracker crumbs
- 1/2 cup mini chocolate chips
- Optional: extra chocolate for drizzling
Substitution Options
- Use almond butter or sunflower seed butter instead of peanut butter for a nut-free option.
- Swap graham cracker crumbs for crushed cookies like Oreos or vanilla wafers.
- Replace mini chocolate chips with white chocolate chips or chopped nuts for variety.
Preparation Section
Step 1: Mix the Base
Start by combining the peanut butter, cream cheese, and melted butter in a large mixing bowl. Use a hand mixer to blend until smooth and creamy. This is where the magic begins! The mixture will be soft and slightly sticky, with a rich golden color that smells absolutely divine. Pro tip: Make sure your cream cheese is softened to avoid lumps.Step 2: Add the Sweetness
Gradually add the powdered sugar and vanilla extract to the mixture. Mix on low speed at first to prevent a sugar cloud from taking over your kitchen (trust me, it happens). Once everything is incorporated, increase the speed and whip until the dough is thick and holds together. At this point, the aroma of vanilla and peanut butter will make your mouth water.Step 3: Fold in the Extras
Gently fold in the graham cracker crumbs and mini chocolate chips. This step gives the cheesecake balls their signature texture and crunch. Be careful not to overmix—you want those chocolate chips to stay intact. Chef’s tip: If the dough feels too sticky, chill it in the fridge for 10 minutes before rolling.Step 4: Roll and Chill
Scoop out small portions of the dough and roll them into bite-sized balls. Place them on a parchment-lined tray and pop them in the fridge for at least 30 minutes. This chilling step firms up the balls so they’re easier to handle. Bonus: The anticipation makes them taste even better!Timing
Here’s the breakdown: Prep time is about 15 minutes, chilling time is 30 minutes, and there’s no cooking required. Total time? Just under an hour. How’s that for efficiency?Chef’s Secret
To take these no bake peanut butter cheesecake balls to the next level, drizzle melted chocolate over the top before serving. A light sprinkle of sea salt adds a gourmet touch that balances the sweetness perfectly.Extra Info
Did you know peanut butter was invented in the early 1900s as a protein-packed food for people who couldn’t chew meat? Fast forward to today, and we’re using it to create decadent desserts like these cheesecake balls. Funny how things evolve, isn’t it?Necessary Equipment
- Large mixing bowl
- Hand mixer or stand mixer
- Parchment paper
- Baking sheet
Storage
These cheesecake balls are best stored in the fridge. Keep them in an airtight container to maintain freshness. They’ll last up to a week, but good luck making them last that long! For longer storage, you can freeze them for up to three months. Just thaw them in the fridge before serving. If you’re freezing, place the balls on a baking sheet lined with parchment paper and freeze until solid. Then transfer them to a freezer-safe bag. This prevents them from sticking together. When reheating frozen balls, let them sit at room temperature for 10–15 minutes. This brings back their creamy texture without losing the crunch.Tips and Advice
For perfectly round balls, wet your hands slightly before rolling. This keeps the dough from sticking and gives you a smooth finish. Another tip: Use a cookie scoop to ensure all the balls are the same size. Consistency is key when you’re aiming for perfection.Presentation Tips
- Serve them on a tiered dessert stand for a fancy look.
- Arrange them in mini cupcake liners for individual servings.
- Drizzle with chocolate and garnish with chopped peanuts for a decorative touch.
Healthier Alternative Recipes
Want to lighten things up? Here are six variations:- Low-Sugar Version: Replace powdered sugar with a sugar substitute like stevia or monk fruit.
- Gluten-Free Option: Use gluten-free graham crackers or crushed gluten-free cookies.
- Dairy-Free Delight: Swap cream cheese for vegan cream cheese and use dairy-free chocolate chips.
- Protein-Packed Balls: Add a scoop of vanilla protein powder to the mix for an extra boost.
- Coconut Lover’s Dream: Roll the balls in shredded coconut instead of graham cracker crumbs.
- Fruit-Infused Twist: Mix in dried cranberries or cherries for a fruity kick.
Common Mistakes to Avoid
Mistake 1: Skipping the Chilling Step
Rushing through the process and skipping the chilling step is a big no-no. Without chilling, the balls will be too soft to hold their shape. Always give them at least 30 minutes in the fridge. Pro tip: If you’re short on time, pop them in the freezer for 10–15 minutes instead.Mistake 2: Overloading with Mix-Ins
It’s tempting to go overboard with chocolate chips or nuts, but too many mix-ins can make the dough fall apart. Stick to the recommended amounts for the perfect balance of flavor and texture.Mistake 3: Using Cold Cream Cheese
Using cold cream cheese makes it difficult to achieve a smooth, lump-free mixture. Always soften your cream cheese beforehand. You can microwave it for 10–15 seconds if you forget to take it out ahead of time.FAQ
Can I use crunchy peanut butter?
Absolutely! Crunchy peanut butter adds a nice texture contrast to the creamy cheesecake filling. Just keep in mind that the balls might be a bit harder to roll smoothly.How long do these cheesecake balls last?
Stored in the fridge, they’ll stay fresh for up to a week. In the freezer, they can last up to three months. Just make sure to seal them tightly to avoid freezer burn.Are these gluten-free?
Not inherently, but you can easily make them gluten-free by using gluten-free graham crackers or cookies. Double-check all your ingredients to ensure they’re certified gluten-free.Can I make these ahead of time?
Yes! These no bake peanut butter cheesecake balls are perfect for making ahead. Prepare them a day or two in advance and store them in the fridge until you’re ready to serve.What’s the best way to melt chocolate for drizzling?
Use a microwave-safe bowl and heat the chocolate in 30-second intervals, stirring between each interval. This ensures even melting without burning. Alternatively, use a double boiler for precise control.Can I add other flavors to the mix?
Of course! Try adding a pinch of cinnamon, espresso powder, or almond extract for a unique twist. Just be careful not to overpower the classic peanut butter and cheesecake flavors.Do I have to use graham cracker crumbs?
Nope! Feel free to experiment with crushed cookies, pretzels, or even cereal for a fun variation. Each option brings its own texture and flavor profile.Are these suitable for kids?
They sure are! Kids love the combination of peanut butter and chocolate. Just make sure there are no allergies to peanuts or dairy before serving.Can I use natural peanut butter?
Yes, but stir it well before measuring. Natural peanut butter tends to separate, so blending it ensures the right consistency.What if I don’t have a hand mixer?
No problem! You can mix the ingredients by hand using a sturdy spatula or wooden spoon. It might take a bit more elbow grease, but it’s totally doable.Final Thoughts
There you have it—everything you need to know about making no bake peanut butter cheesecake balls. Whether you’re a seasoned baker or a newbie in the kitchen, this recipe is foolproof and fun. So grab your ingredients, crank up your favorite playlist, and get ready to impress everyone with these irresistible treats. Happy baking—or should I say, no-baking!Ingredients
Equipment
Method
- Combine the peanut butter, cream cheese, and melted butter in a large mixing bowl; blend until smooth and creamy.
- Gradually add the powdered sugar and vanilla extract; mix on low speed initially, then increase speed until thick and well combined.
- Gently fold in the graham cracker crumbs and mini chocolate chips; avoid overmixing.
- Scoop out small portions of the dough and roll into bite-sized balls; place on a parchment-lined tray and chill in the fridge for at least 30 minutes.