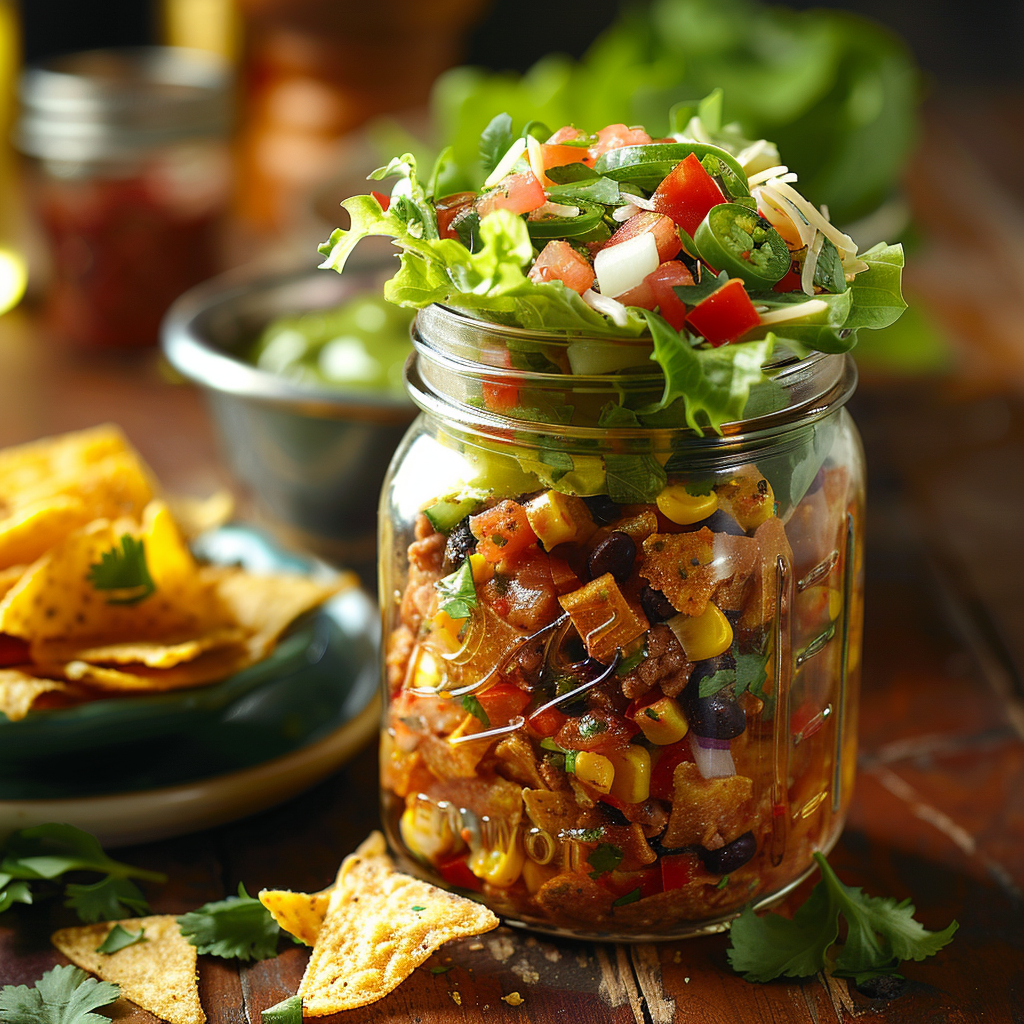
Why You’ll Love This Recipe
Let me tell you a little secret. A few months ago, I was stuck in the lunch rut of all lunch ruts. Sandwiches? Boring. Pasta salads? Meh. That’s when I stumbled upon Mason Jar Mason Jar Taco Salads for Lunch. It felt like a lightbulb moment! Not only is this dish colorful and fun to make, but it also tastes like your favorite taco night—only healthier and way more portable. After testing it for my family’s picnic, it became a hit. Trust me, once you try this recipe, you’ll never look back.
A Little Background on Taco Salads
Taco salads have been around forever, but packing them in mason jars? That’s a modern twist I can totally get behind. The concept of layering ingredients in jars started gaining popularity a few years ago as a way to keep meals fresh and mess-free. My first attempt at making Mason Jar Mason Jar Taco Salads for Lunch was for a friend’s birthday potluck. Everyone kept asking me how I made it so vibrant and tasty. It’s not just food—it’s an experience!
Why You’ll Love This Recipe
This recipe is a game-changer for anyone who loves bold flavors without the fuss. Imagine crunchy lettuce, zesty seasoned beef, creamy avocado, and tangy salsa—all packed neatly into a jar. It’s easy to prep ahead, making it perfect for busy weekdays or lazy weekends. Plus, everything stays fresh until you’re ready to eat. And let’s not forget the best part: shaking it up and pouring it into a bowl feels like unwrapping a gift!
Perfect Occasions to Prepare This Recipe
Whether you’re packing lunch for work, heading to a picnic, or need a quick meal for the kids, this recipe fits the bill. I’ve used it for office potlucks, road trips, and even as a post-workout snack. It’s versatile enough to suit any occasion where you want something healthy, filling, and Instagram-worthy.
Ingredients
- 1 pound ground beef or turkey
- 1 packet taco seasoning
- 4 cups chopped romaine lettuce
- 1 cup cherry tomatoes, halved
- 1 cup shredded cheddar cheese
- 1 avocado, diced
- 1/2 cup black beans, rinsed and drained
- 1/2 cup corn kernels (fresh or frozen)
- 1/4 cup salsa
- 4 mason jars (16 oz each)
Substitution Options
- Swap ground beef for chicken, tofu, or plant-based meat alternatives.
- Use Greek yogurt instead of sour cream for a lighter option.
- Replace romaine lettuce with spinach or kale if you prefer.
- Add quinoa or rice for extra fiber and protein.
Preparation Section
Step 1: Cook the Protein
Heat a skillet over medium heat and add your choice of ground meat. Once browned, sprinkle in the taco seasoning and cook according to the package instructions. The aroma of spices filling your kitchen will make your mouth water. Pro tip: Drain excess fat to keep it light and healthy.
Step 2: Prep Your Veggies
While the meat cooks, chop your veggies. Halve those juicy cherry tomatoes, dice the creamy avocado, and shred that cheddar cheese. Don’t skip this step—it’s what makes the salad pop with color and texture. Chef’s tip: Toss avocado with a squeeze of lime juice to prevent browning.
Step 3: Layer the Jars
Now comes the fun part! Start by adding salsa to the bottom of each jar. This creates a barrier to keep the greens crisp. Next, layer in the black beans, corn, cooked meat, cheese, tomatoes, and finally the lettuce. Think of it as building a delicious edible tower. Pro tip: Pack tightly to avoid shifting during transport.
Step 4: Seal and Store
Once your jars are beautifully layered, seal them tightly with their lids. They’re now ready to grab and go! If you’re prepping for later, store them in the fridge until needed. Just remember to keep the dressing separate if you’re using any extras.
Timing
Here’s a quick breakdown of the timing:
- Prep Time: 15 minutes
- Cooking Time: 10 minutes
- Total Time: 25 minutes
It’s fast, efficient, and perfect for busy mornings.
Chef’s Secret
To elevate your Mason Jar Mason Jar Taco Salads for Lunch, toast your spices before mixing them into the meat. This simple trick releases their oils and intensifies the flavor. Trust me—it makes a world of difference.
Extra Info
Did you know mason jars were originally designed for preserving fruits and vegetables? These days, they’ve become a symbol of creativity and sustainability in the kitchen. Using them for salads reduces waste and keeps your meals fresh longer.
Necessary Equipment
- Skillet
- Cutting board and knife
- Measuring cups and spoons
- 16-ounce mason jars
Storage
These salads are designed to last. When stored properly in the fridge, they stay fresh for up to three days. Keep the dressing separate to avoid sogginess. For best results, place the jars upright and avoid stacking heavy items on top. If you notice any signs of spoilage, like off smells or discoloration, toss it out. Safety first!
Proper storage ensures that every bite remains as flavorful as the first. I always label my jars with the date so I know exactly when to enjoy them by. Lastly, don’t forget to shake well before serving—it mixes everything perfectly.
Tips and Advice
If you’re new to meal prepping, start small. Make just one or two jars to see how you like them. Another tip: Use wide-mouth jars for easier layering. And here’s a golden rule—always assemble the jars in the same order to maintain freshness.
Presentation Tips
- Serve in a colorful bowl to enhance visual appeal.
- Garnish with fresh cilantro or a lime wedge for a pop of green.
- Top with crushed tortilla chips for added crunch.
Healthier Alternative Recipes
Looking for variations? Here are six ideas:
- Vegan Option: Swap meat for lentils or chickpeas.
- Low-Carb Version: Replace tortilla chips with sliced cucumbers.
- Dairy-Free Delight: Use nutritional yeast instead of cheese.
- Spicy Kick: Add jalapeños or hot sauce to the mix.
- Protein-Packed Power: Include grilled chicken or hard-boiled eggs.
- Kid-Friendly Twist: Use mild salsa and omit spicy seasonings.
Common Mistakes to Avoid
Mistake 1: Skipping the Salsa Base
Without the salsa at the bottom, your greens might get soggy. Always start with a liquid layer to protect the lettuce. Pro tip: Experiment with different salsas to find your favorite flavor.
Mistake 2: Overloading the Jars
Stuffing too many ingredients can make the jar difficult to close and shake. Stick to the recommended amounts for the best results. Remember, less is more when it comes to packing.
Mistake 3: Forgetting to Shake
The magic happens when you shake the jar! Skipping this step means uneven distribution of flavors. Give it a good shake before pouring into a bowl.
FAQ
Can I use glass containers other than mason jars?
Absolutely! While mason jars are ideal due to their sealing capabilities, any airtight container works. Just ensure it’s durable and leak-proof for portability.
How long do these salads last in the fridge?
When stored correctly, they remain fresh for up to three days. Beyond that, the quality may decline, especially with perishable items like avocado.
Can I freeze these salads?
Freezing isn’t recommended because delicate ingredients like lettuce and avocado won’t hold up well. Stick to refrigeration for optimal taste and texture.
What’s the best way to reheat the meat?
If you’re using leftovers, microwave the meat separately before assembling the jar. This prevents wilting the greens.
Is this recipe kid-friendly?
Yes! Kids love the interactive aspect of shaking and pouring. Customize it with milder flavors to suit their taste buds.
Can I add dressing directly to the jar?
It’s better to keep dressings separate to avoid sogginess. Pack a small container alongside the jar for convenience.
How do I make this recipe vegetarian?
Swap the meat for plant-based proteins like beans, tofu, or tempeh. The rest of the recipe stays the same.
What size jar should I use?
A standard 16-ounce jar works perfectly. It holds enough for a satisfying meal without being overwhelming.
Can I prep these salads for a crowd?
Definitely! Double or triple the recipe based on your needs. It’s a great option for parties or events.
What makes this recipe unique?
The combination of convenience, flavor, and presentation sets it apart. It’s practical yet visually stunning—a true crowd-pleaser.
Final Thoughts
Making Mason Jar Mason Jar Taco Salads for Lunch has transformed my meal prep routine. It’s quick, nutritious, and oh-so-delicious. Whether you’re feeding yourself, your family, or a group of friends, this recipe delivers every time. So grab your jars, gather your ingredients, and get ready to fall in love with lunch again. Happy cooking!

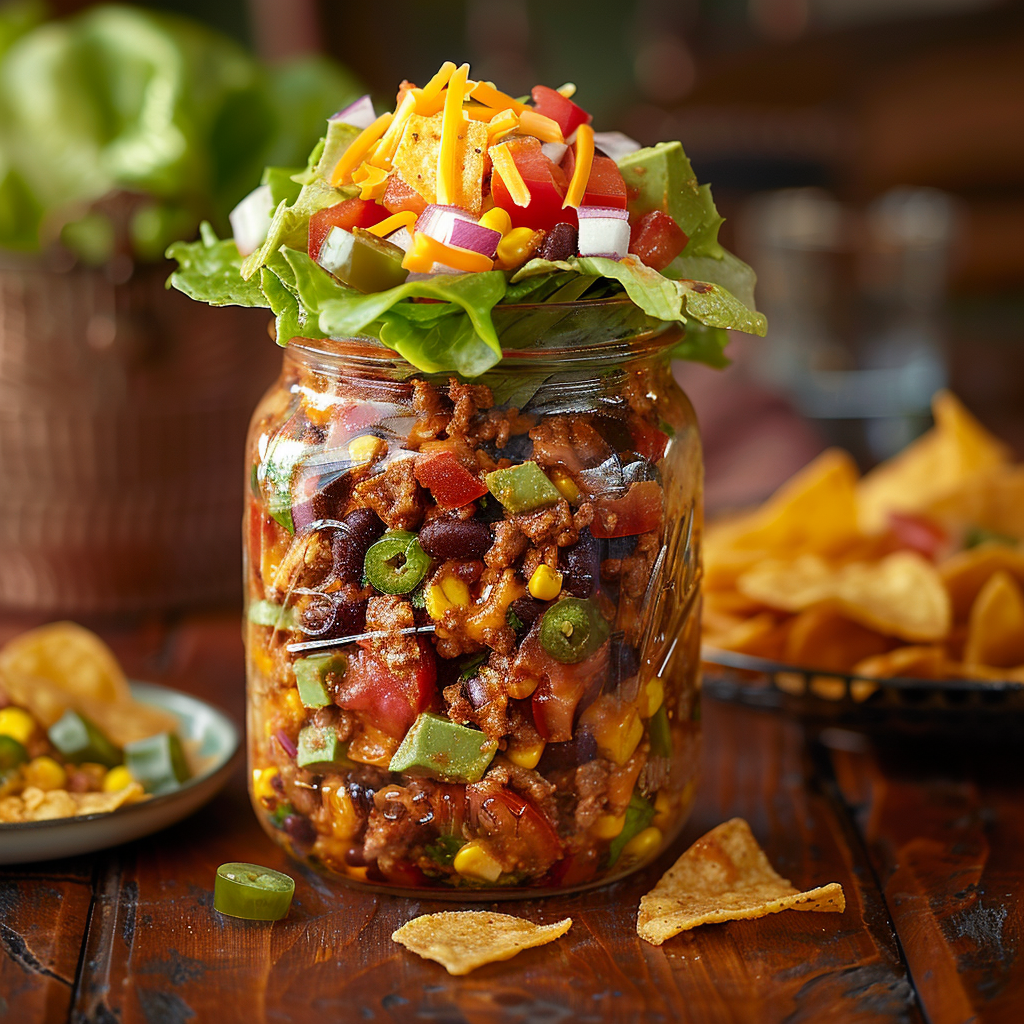
Mason Jar Taco Salads for Lunch: Delicious & Easy Meal Prep Idea
Why You’ll Love This Recipe
Let me tell you a little secret. A few months ago, I was stuck in the lunch rut of all lunch ruts. Sandwiches? Boring. Pasta salads? Meh. That’s when I stumbled upon Mason Jar Taco Salads for Lunch. It felt like a lightbulb moment! Not only is this dish colorful and fun to make, but it also tastes like your favorite taco night—only healthier and way more portable. After testing it for my family’s picnic, it became a hit. Trust me, once you try this recipe, you’ll never look back.A Little Background on Taco Salads
Taco salads have been around forever, but packing them in mason jars? That’s a modern twist I can totally get behind. The concept of layering ingredients in jars started gaining popularity a few years ago as a way to keep meals fresh and mess-free. My first attempt at making Mason Jar Taco Salads for Lunch was for a friend’s birthday potluck. Everyone kept asking me how I made it so vibrant and tasty. It’s not just food—it’s an experience!Why You’ll Love This Recipe
This recipe is a game-changer for anyone who loves bold flavors without the fuss. Imagine crunchy lettuce, zesty seasoned beef, creamy avocado, and tangy salsa—all packed neatly into a jar. It’s easy to prep ahead, making it perfect for busy weekdays or lazy weekends. Plus, everything stays fresh until you’re ready to eat. And let’s not forget the best part: shaking it up and pouring it into a bowl feels like unwrapping a gift!Perfect Occasions to Prepare This Recipe
Whether you’re packing lunch for work, heading to a picnic, or need a quick meal for the kids, this recipe fits the bill. I’ve used it for office potlucks, road trips, and even as a post-workout snack. It’s versatile enough to suit any occasion where you want something healthy, filling, and Instagram-worthy.Ingredients
- 1 pound ground beef or turkey
- 1 packet taco seasoning
- 4 cups chopped romaine lettuce
- 1 cup cherry tomatoes, halved
- 1 cup shredded cheddar cheese
- 1 avocado, diced
- 1/2 cup black beans, rinsed and drained
- 1/2 cup corn kernels (fresh or frozen)
- 1/4 cup salsa
- 4 mason jars (16 oz each)
Substitution Options
- Swap ground beef for chicken, tofu, or plant-based meat alternatives.
- Use Greek yogurt instead of sour cream for a lighter option.
- Replace romaine lettuce with spinach or kale if you prefer.
- Add quinoa or rice for extra fiber and protein.
Preparation Section
Step 1: Cook the Protein
Heat a skillet over medium heat and add your choice of ground meat. Once browned, sprinkle in the taco seasoning and cook according to the package instructions. The aroma of spices filling your kitchen will make your mouth water. Pro tip: Drain excess fat to keep it light and healthy.Step 2: Prep Your Veggies
While the meat cooks, chop your veggies. Halve those juicy cherry tomatoes, dice the creamy avocado, and shred that cheddar cheese. Don’t skip this step—it’s what makes the salad pop with color and texture. Chef’s tip: Toss avocado with a squeeze of lime juice to prevent browning.Step 3: Layer the Jars
Now comes the fun part! Start by adding salsa to the bottom of each jar. This creates a barrier to keep the greens crisp. Next, layer in the black beans, corn, cooked meat, cheese, tomatoes, and finally the lettuce. Think of it as building a delicious edible tower. Pro tip: Pack tightly to avoid shifting during transport.Step 4: Seal and Store
Once your jars are beautifully layered, seal them tightly with their lids. They’re now ready to grab and go! If you’re prepping for later, store them in the fridge until needed. Just remember to keep the dressing separate if you’re using any extras.Timing
Here’s a quick breakdown of the timing:- Prep Time: 15 minutes
- Cooking Time: 10 minutes
- Total Time: 25 minutes
Chef’s Secret
To elevate your Mason Jar Taco Salads for Lunch, toast your spices before mixing them into the meat. This simple trick releases their oils and intensifies the flavor. Trust me—it makes a world of difference.Extra Info
Did you know mason jars were originally designed for preserving fruits and vegetables? These days, they’ve become a symbol of creativity and sustainability in the kitchen. Using them for salads reduces waste and keeps your meals fresh longer.Necessary Equipment
- Skillet
- Cutting board and knife
- Measuring cups and spoons
- 16-ounce mason jars
Storage
These salads are designed to last. When stored properly in the fridge, they stay fresh for up to three days. Keep the dressing separate to avoid sogginess. For best results, place the jars upright and avoid stacking heavy items on top. If you notice any signs of spoilage, like off smells or discoloration, toss it out. Safety first! Proper storage ensures that every bite remains as flavorful as the first. I always label my jars with the date so I know exactly when to enjoy them by. Lastly, don’t forget to shake well before serving—it mixes everything perfectly.Tips and Advice
If you’re new to meal prepping, start small. Make just one or two jars to see how you like them. Another tip: Use wide-mouth jars for easier layering. And here’s a golden rule—always assemble the jars in the same order to maintain freshness.
Presentation Tips
- Serve in a colorful bowl to enhance visual appeal.
- Garnish with fresh cilantro or a lime wedge for a pop of green.
- Top with crushed tortilla chips for added crunch.
Healthier Alternative Recipes
Looking for variations? Here are six ideas:- Vegan Option: Swap meat for lentils or chickpeas.
- Low-Carb Version: Replace tortilla chips with sliced cucumbers.
- Dairy-Free Delight: Use nutritional yeast instead of cheese.
- Spicy Kick: Add jalapeños or hot sauce to the mix.
- Protein-Packed Power: Include grilled chicken or hard-boiled eggs.
- Kid-Friendly Twist: Use mild salsa and omit spicy seasonings.
Common Mistakes to Avoid
Mistake 1: Skipping the Salsa Base
Without the salsa at the bottom, your greens might get soggy. Always start with a liquid layer to protect the lettuce. Pro tip: Experiment with different salsas to find your favorite flavor.Mistake 2: Overloading the Jars
Stuffing too many ingredients can make the jar difficult to close and shake. Stick to the recommended amounts for the best results. Remember, less is more when it comes to packing.Mistake 3: Forgetting to Shake
The magic happens when you shake the jar! Skipping this step means uneven distribution of flavors. Give it a good shake before pouring into a bowl.FAQ
Can I use glass containers other than mason jars?
Absolutely! While mason jars are ideal due to their sealing capabilities, any airtight container works. Just ensure it’s durable and leak-proof for portability.How long do these salads last in the fridge?
When stored correctly, they remain fresh for up to three days. Beyond that, the quality may decline, especially with perishable items like avocado.Can I freeze these salads?
Freezing isn’t recommended because delicate ingredients like lettuce and avocado won’t hold up well. Stick to refrigeration for optimal taste and texture.What’s the best way to reheat the meat?
If you’re using leftovers, microwave the meat separately before assembling the jar. This prevents wilting the greens.Is this recipe kid-friendly?
Yes! Kids love the interactive aspect of shaking and pouring. Customize it with milder flavors to suit their taste buds.Can I add dressing directly to the jar?
It’s better to keep dressings separate to avoid sogginess. Pack a small container alongside the jar for convenience.How do I make this recipe vegetarian?
Swap the meat for plant-based proteins like beans, tofu, or tempeh. The rest of the recipe stays the same.What size jar should I use?
A standard 16-ounce jar works perfectly. It holds enough for a satisfying meal without being overwhelming.Can I prep these salads for a crowd?
Definitely! Double or triple the recipe based on your needs. It’s a great option for parties or events.What makes this recipe unique?
The combination of convenience, flavor, and presentation sets it apart. It’s practical yet visually stunning—a true crowd-pleaser.Final Thoughts
Making Mason Jar Taco Salads for Lunch has transformed my meal prep routine. It’s quick, nutritious, and oh-so-delicious. Whether you’re feeding yourself, your family, or a group of friends, this recipe delivers every time. So grab your jars, gather your ingredients, and get ready to fall in love with lunch again. Happy cooking!Ingredients
Equipment
Method
- Heat a skillet over medium heat and add your choice of ground meat. Once browned, sprinkle in the taco seasoning and cook according to the package instructions. Drain excess fat.
- While the meat cooks, chop your veggies. Halve cherry tomatoes, dice avocado, and shred cheddar cheese. Toss avocado with lime juice to prevent browning.
- Start layering the jars: add salsa to the bottom, followed by black beans, corn, cooked meat, cheese, tomatoes, and finally the lettuce. Pack tightly.
- Seal the jars tightly with their lids. Store in the fridge until needed, keeping dressing separate.