
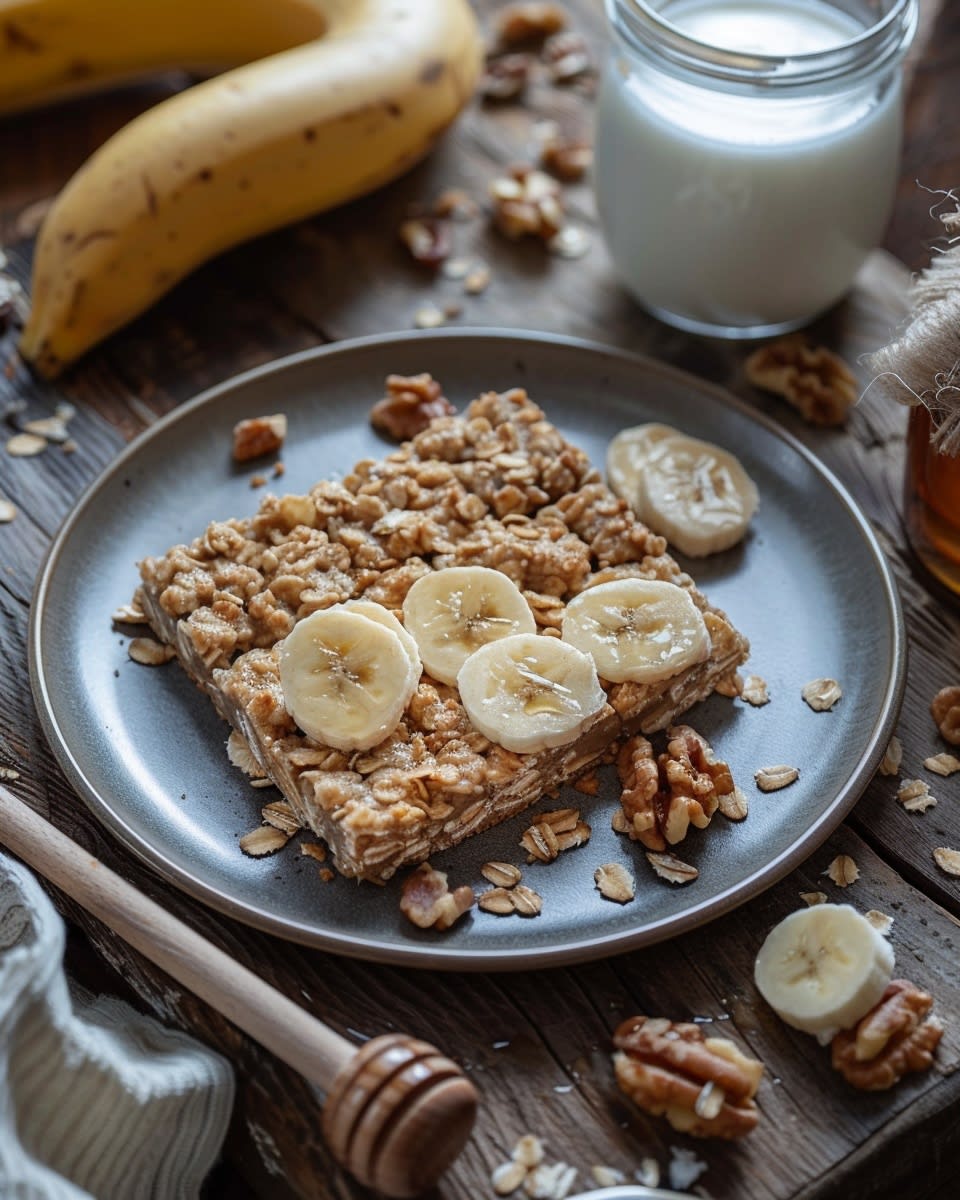
Discover the Joy of Baking Nutritious Banana Oat Bars
There’s something magical about the aroma of freshly baked banana oat bars wafting through the kitchen. It reminds me of Sunday mornings, sipping coffee and chatting with friends while these yummy treats are in the oven. I’ve made this recipe countless times, and it’s always a hit. Today, I’m excited to share my favorite version of Nutritious Banana Oat Bars with you. These bars are not only delicious but also packed with wholesome goodness.
The Story Behind Banana Oat Bars: A Delightful Blend of Tradition and Modernity
These bars have a rich history that spans generations. Originally, they were a simple, hearty breakfast or snack for families. Over time, they’ve evolved to include a variety of ingredients, making them even more versatile and nutritious. My great-grandma used to make them with just a few basic ingredients, and now, I add a modern twist by including nuts and seeds for extra crunch and nutrition.
Why You’ll Fall in Love with This Recipe
These Nutritious Banana Oat Bars are a true delight. They’re naturally sweet, chewy, and have a satisfying texture. The best part is that they’re incredibly easy to make. Even if you’re a beginner in the kitchen, you can whip up a batch in no time. Plus, they’re perfect for a quick breakfast, a midday snack, or a guilt-free dessert. The combination of bananas and oats makes them a healthy and delicious treat for everyone.
Perfect Occasions to Prepare These Bars
These bars are perfect for any occasion. Whether you’re hosting a brunch, packing a lunch box, or looking for a post-workout snack, these bars fit the bill. They’re also a great addition to picnics and potlucks. My kids love them as an after-school snack, and I often take a couple to work for a mid-morning boost. They’re so versatile and always a crowd-pleaser!
Ingredients for Nutritious Banana Oat Bars
- 3 ripe bananas
- 2 cups rolled oats
- 1/2 cup almond butter
- 1/4 cup honey (or maple syrup for a vegan option)
- 1/2 cup chopped walnuts (optional)
- 1/2 cup dark chocolate chips (optional)
- 1 tsp vanilla extract
- 1/2 tsp ground cinnamon
- 1/4 tsp salt
Substitution Options
If you don’t have some of the ingredients, don’t worry! Here are some easy substitutions:
- Almond butter can be swapped with peanut butter or sunflower seed butter.
- Walnuts can be replaced with pecans or almonds.
- Dark chocolate chips can be substituted with white chocolate chips or dried fruit like raisins or cranberries.
Preparation of Nutritious Banana Oat Bars
Step 1: Preheat Your Oven
Start by preheating your oven to 350°F (175°C). This will ensure that your oven is ready when you are. While the oven is heating up, line an 8×8 inch baking pan with parchment paper. This will make it easier to remove the bars once they’re done. Trust me, you’ll thank me later!
Step 2: Mash the Bananas
In a large mixing bowl, mash the ripe bananas until they’re smooth. The riper the bananas, the sweeter and more flavorful your bars will be. Add the almond butter, honey, and vanilla extract to the mashed bananas. Mix well until everything is thoroughly combined. The mixture should be thick and creamy, like a smooth batter.
Step 3: Combine Dry Ingredients
In a separate bowl, mix the rolled oats, chopped walnuts, dark chocolate chips, cinnamon, and salt. Stir them together until they’re evenly distributed. Now, slowly pour the dry ingredients into the banana mixture, stirring gently until everything is well combined. The mixture should be slightly sticky and hold together when pressed.
Step 4: Bake to Perfection
Pour the mixture into the prepared baking pan and spread it out evenly. Use a spatula to press the mixture down firmly, ensuring it’s flat and even. Place the pan in the preheated oven and bake for about 25-30 minutes, or until the edges are golden brown and the center is set. Pro tip: Check the bars at 20 minutes to avoid overbaking. The smell will be irresistible, but patience is key!
Step 5: Cool and Cut
Once the bars are done, remove them from the oven and let them cool in the pan for at least 15 minutes. This cooling step is crucial as it helps the bars set and makes them easier to cut. After 15 minutes, lift the bars out of the pan using the parchment paper and transfer them to a cutting board. Cut them into squares or rectangles, depending on your preference. Chef’s tip: For a neater cut, use a sharp knife and wipe it clean between cuts.
Timing Details
Here’s a breakdown of the timing for this recipe:
- Prep Time: 10 minutes
- Cooking Time: 25-30 minutes
- Cooling Time: 15 minutes
- Total Time: 50-55 minutes
Chef’s Secret: A Special Trick to Enhance the Flavor
To give these bars an extra burst of flavor, sprinkle a little bit of sea salt on top before baking. The salt enhances the natural sweetness of the bananas and adds a subtle, savory note. It’s a simple trick that makes a big difference. I learned this from a friend who is a professional baker, and it’s a game-changer!
Extra Info: An Interesting Fact About Bananas
Did you know that bananas are one of the most widely consumed fruits in the world? They’re not only delicious but also packed with essential nutrients like potassium, vitamin C, and fiber. Bananas are a fantastic ingredient to add to your baking, especially if you’re looking for a low added sugar option. They naturally sweeten your recipes without the need for excessive sugar.
Necessary Equipment
Here’s a list of the tools and utensils you’ll need:
- A mixing bowl
- An 8×8 inch baking pan
- Parchment paper
- A spatula
- A sharp knife for cutting
Storage Tips
Proper storage is key to keeping your Nutritious Banana Oat Bars fresh and delicious. Here’s how to store them:
Store the bars in an airtight container at room temperature for up to 5 days. If you live in a warmer climate, consider storing them in the refrigerator to extend their shelf life. For long-term storage, you can freeze the bars. Wrap each bar individually in plastic wrap and place them in a freezer-safe bag. They can last up to 3 months in the freezer. When you’re ready to enjoy them, simply thaw at room temperature or reheat in the oven for a few minutes.
Tips and Advice
Here are a few tips to make your bars even better:
- Use ripe bananas for the best flavor and sweetness.
- Feel free to add other mix-ins like dried fruit, different types of nuts, or even a sprinkle of chia seeds for extra nutrition.
- For a more indulgent treat, drizzle a little melted dark chocolate over the cooled bars before cutting them.
Presentation Tips
These bars are not only delicious but also pretty enough to serve at a gathering. Here are some presentation ideas:
- Arrange the bars on a platter with a dusting of powdered sugar for an elegant touch.
- Serve them with a dollop of Greek yogurt or a scoop of vanilla ice cream for a decadent experience.
- Garnish with a sprinkle of cinnamon or a few slices of fresh banana for a pop of color.
6 Healthier Alternative Recipes
If you’re looking to switch things up, here are six delicious variations of Nutritious Banana Oat Bars:
- Berry Oat Bars: Replace the chocolate chips with a mix of fresh berries like blueberries, raspberries, and strawberries. Check out our Berry Yogurt Popsicles for another berry-inspired treat.
- Apple Cinnamon Oat Bars: Swap the bananas for grated apples and add a teaspoon of ground cinnamon for a warm, spiced flavor.
- Protein-Packed Oat Bars: Add a scoop of protein powder to the banana mixture for an extra boost. Try our Protein-Packed Brownies for another high-protein snack.
- Carrot Cake Oat Bars: Shred some carrots and add them to the mix along with a teaspoon of nutmeg and a handful of raisins.
- Minty Oat Bars: Add a handful of fresh mint leaves to the banana mixture for a refreshing twist. Our Minty Fruit Delight recipe is another great way to incorporate mint into your desserts.
- Avocado Oat Bars: Substitute half of the bananas with mashed avocado for a creamier texture. You might also enjoy our Creamy Avocado Mousse for a similar creamy, healthy dessert.
Common Mistakes to Avoid
Mistake 1: Using Underripe Bananas
Using underripe bananas can result in a less sweet and more starchy taste. Make sure your bananas are nice and ripe, with plenty of brown spots. Ripe bananas are naturally sweeter and will give your bars a better flavor. If your bananas are not quite ripe, try leaving them in a brown paper bag for a day or two to speed up the process.
Mistake 2: Not Pressing the Mixture Firmly
If you don’t press the mixture firmly into the pan, the bars may fall apart when you cut them. Use a spatula or the back of a spoon to press the mixture down firmly and evenly. This will help the bars hold together and make them easier to cut. Pro tip: Wet the spatula or spoon slightly to prevent sticking.
Mistake 3: Overbaking the Bars
Overbaking can make the bars dry and tough. Keep an eye on them during the last 10 minutes of baking and check for doneness. The edges should be golden brown, and the center should be set but still slightly soft. If you’re unsure, err on the side of caution and remove them a little early. You can always bake them a bit longer if needed.
Mistake 4: Not Letting Them Cool Properly
Not letting the bars cool properly can make them difficult to cut and may result in a crumbly mess. Allow the bars to cool in the pan for at least 15 minutes before transferring them to a cutting board. This cooling period helps the bars set and makes them much easier to handle. Patience is a virtue, and it’s worth the wait!
Mistake 5: Using Too Much Honey
While honey is a natural sweetener, using too much can make the bars overly sweet and sticky. Stick to the recommended amount, and if you prefer a less sweet bar, you can reduce the honey a bit. Remember, the bananas already add a lot of natural sweetness, so you don’t need to go overboard with the honey.
FAQ: Your Questions Answered
Can I make these bars without nuts?
Absolutely! If you have a nut allergy or just prefer not to use nuts, you can leave them out. The bars will still be delicious and nutritious. You can also add other mix-ins like seeds or dried fruit to keep the texture interesting.
Are these bars gluten-free?
Yes, these bars can be made gluten-free if you use certified gluten-free oats. Always check the labels of your ingredients to ensure they meet your dietary needs. Oats are naturally gluten-free, but they can sometimes be processed in facilities that also handle wheat, so it’s important to use certified gluten-free oats.
Can I use other types of nut butter?
Definitely! Almond butter is a great choice, but you can also use peanut butter, cashew butter, or even sunflower seed butter. Each type of nut butter will add a slightly different flavor, so experiment and find your favorite. Just make sure the nut butter you choose is natural and doesn’t contain any added sugars or oils.
How can I make these bars vegan?
To make these bars vegan, simply replace the honey with maple syrup or agave nectar. Both are excellent natural sweeteners and will work well in this recipe. You can also use a vegan dark chocolate if you decide to add chocolate chips. The rest of the ingredients are already vegan-friendly, so it’s a simple swap.
Can I freeze these bars?
Yes, you can definitely freeze these bars. To do so, let them cool completely, then wrap each bar individually in plastic wrap and place them in a freezer-safe bag. They can be stored in the freezer for up to 3 months. When you’re ready to eat them, just thaw at room temperature or reheat in the oven for a few minutes.
What can I use instead of dark chocolate chips?
If you don’t have dark chocolate chips, you can use white chocolate chips, milk chocolate chips, or even chopped dark chocolate. If you want to keep it healthier, you can also use cacao nibs or dried fruit like raisins, cranberries, or chopped dates. The options are endless, so feel free to get creative!
Can I add other ingredients to the bars?
Absolutely! You can add a variety of mix-ins to customize the bars to your liking. Some popular options include dried fruit, different types of nuts, seeds, and even spices like nutmeg or cardamom. Just be mindful of the total volume of mix-ins, as adding too many can affect the texture. Start with about 1/2 cup of additional mix-ins and adjust as needed.
How long do these bars stay fresh?
When stored in an airtight container at room temperature, these bars will stay fresh for up to 5 days. If you live in a hot climate, you may want to store them in the refrigerator to extend their shelf life. In the freezer, they can last up to 3 months. Just make sure to wrap them well to prevent freezer burn.
Can I use quick oats instead of rolled oats?
While you can use quick oats, the texture of the bars will be a bit different. Quick oats are more finely processed and will result in a softer, more crumbly bar. If you prefer a chewier texture, stick with rolled oats. If you only have quick oats, you can still make the bars, but just be aware that the texture will be slightly different.
Are these bars suitable for kids?
Absolutely! These bars are a great snack for kids. They’re naturally sweet, full of fiber and nutrients, and they don’t contain any artificial additives. Just make sure to chop the nuts and chocolate chips into small pieces to prevent choking, especially for younger children. You can also leave out the nuts if you prefer.
Whether you’re baking for a cozy family gathering or just looking for a healthy, delicious snack, these Nutritious Banana Oat Bars are sure to become a favorite. They’re simple to make, packed with flavor, and perfect for any occasion. Happy baking!
Nutritious Banana Oat Bars
Ingredients
Equipment
Method
- Preheat your oven to 350°F (175°C) and line an 8x8 inch baking pan with parchment paper.
- Mash the ripe bananas in a large mixing bowl until smooth.
- Add almond butter, honey, and vanilla extract to the mashed bananas and mix well.
- In a separate bowl, combine oats, walnuts, chocolate chips, cinnamon, and salt. Stir to distribute evenly.
- Pour the dry ingredients into the banana mixture and stir gently until well combined.
- Transfer the mixture to the prepared baking pan and press down evenly.
- Bake for about 25-30 minutes, checking at 20 minutes to avoid overbaking.
- Once done, let the bars cool in the pan for at least 15 minutes before lifting them out and cutting into squares or rectangles.