
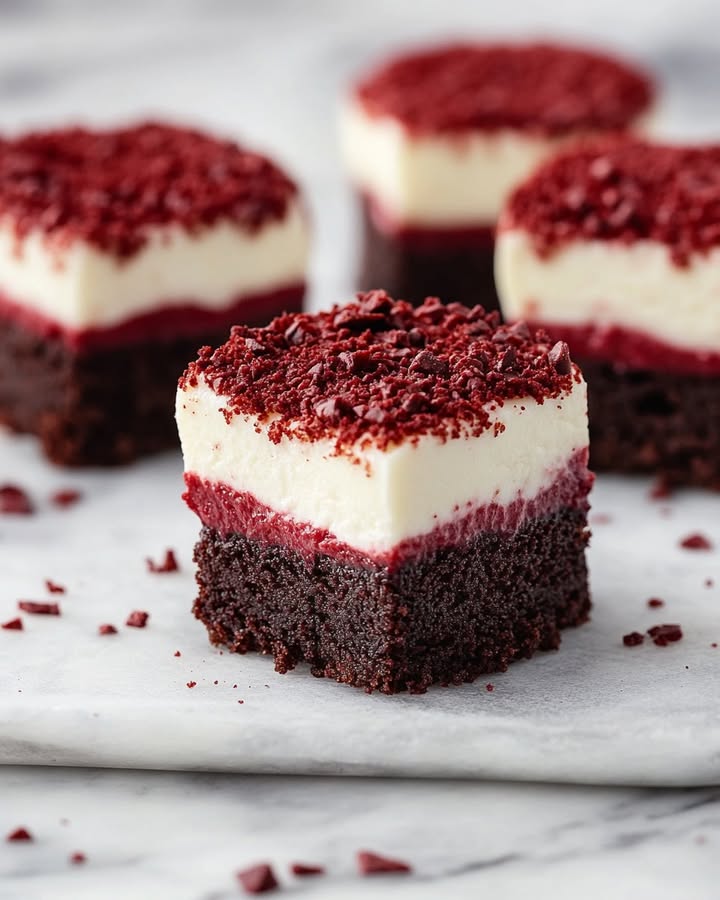
Get Ready for a Burst of Flavor with Red Velvet Brownie Bottom Mini Cheesecakes
There’s something magical about the combination of rich, chocolatey brownie and creamy, tangy cheesecake. These Red Velvet Brownie Bottom Mini Cheesecakes are not just a treat; they’re a little slice of heaven! Perfect for parties, holidays, or just a cozy night in, these mini desserts are sure to be a hit with everyone.
A Brief History and Background
Red velvet cake has a long and fascinating history. It originally gained popularity in the 1920s, but its roots can be traced back even further. The addition of red food coloring gave it that iconic, vibrant hue, making it a showstopper at any gathering. Over the years, it’s evolved into various forms, including cupcakes, layer cakes, and now, these delectable mini cheesecakes.
Why You’ll Love This Recipe
This recipe is a delightful blend of textures and flavors. The rich, velvety brownie base compleces the smooth, creamy cheesecake perfectly. Plus, it’s surprisingly easy to make, even for beginners. The vibrant red color adds a touch of elegance, making it a standout dessert for any occasion.
Perfect Occasions to Prepare This Recipe
These mini cheesecakes are perfect for a variety of events. Whether you’re hosting a birthday party, a holiday gathering, or just want to surprise your family with a special treat, these Red Velvet Cheesecake Bites will be a hit. They also make a great gift for friends and neighbors!
Ingredients
For the Red Velvet Brownie Base:
- 1/2 cup unsalted butter, melted
- 1 cup granulated sugar
- 2 large eggs
- 1 teaspoon vanilla extract
- 1 tablespoon red food coloring
- 1 teaspoon white vinegar
- 1/4 cup cocoa powder
- 3/4 cup all-purpose flour
- 1/4 teaspoon salt
For the Cheesecake Layer:
- 16 oz cream cheese, softened
- 1/2 cup granulated sugar
- 2 large eggs
- 1 teaspoon vanilla extract
Substitution Options
If you’re looking for some substitutions, here are a few options:
- Butter: You can use coconut oil or margarine if you prefer.
- Eggs: For an egg-free version, try using applesauce or a commercial egg replacer.
- Cocoa Powder: Dutch-processed cocoa powder can be used for a deeper, richer flavor.
Preparation
Step 1: Preheat and Prepare the Muffin Tin
Start by preheating your oven to 350°F (175°C). Grease a 12-cup muffin tin or line it with paper liners. This step ensures that your cheesecakes will come out easily without sticking.
Step 2: Prepare the Brownie Base
In a large bowl, whisk together the melted butter and sugar until smooth. Add the eggs, vanilla, red food coloring, and white vinegar, and mix until everything is well combined. Gently stir in the cocoa powder, flour, and salt. The mixture should be smooth and vibrant red, ready to go into the muffin cups.
Step 3: Fill the Muffin Cups with Brownie Batter
Divide the brownie batter among the muffin cups, filling each one about 1/3 full. Use a spoon to smooth the tops. This creates a nice, even base for the cheesecake layer.
Step 4: Prepare the Cheesecake Layer
In another bowl, beat the softened cream cheese with the sugar until it’s creamy and smooth. Add the eggs and vanilla, blending until fully incorporated. The mixture should be smooth and free of lumps. This creamy cheesecake layer is the perfect complement to the rich brownie base.
Step 5: Top the Brownies with Cheesecake Batter
Spoon the cheesecake batter over the brownie layer in each muffin cup, filling them to the top. Make sure the layers are even, so every bite is a perfect blend of both flavors.
Step 6: Bake and Cool
Bake the mini cheesecakes for 18-20 minutes, or until they are set and the edges are golden. Remove them from the oven and let them cool completely in the pan. Cooling is essential for a clean and beautiful presentation.
Timing
Preparing these mini cheesecakes is a breeze. Here’s a breakdown of the time required:
- Preparation Time: 20 minutes
- Baking Time: 20 minutes
- Total Time: 40 minutes
Chef’s Secret
One of my favorite secrets is to use gel food coloring instead of liquid. It gives a more vibrant, intense red color, making your Red Velvet Cheesecake Bites look even more stunning. Plus, it doesn’t add extra liquid to the batter, which helps keep the texture perfect.
Extra Info
Did you know that the red color in traditional red velvet cake comes from the reaction between cocoa powder and acidic ingredients like buttermilk? In this recipe, we use red food coloring to achieve that iconic red hue, but the taste remains true to the classic red velvet flavor.
Necessary Equipment
To make these mini cheesecakes, you’ll need the following equipment:
- Muffin Tin: A 12-cup muffin tin
- Oven: To bake the cheesecakes
- Bowls: For mixing the brownie and cheesecake batters
- Spatula or Spoon: For stirring and smoothing the batter
Storage
Store the mini cheesecakes in an airtight container in the refrigerator. They will stay fresh for up to 5 days. If you want to freeze them, wrap each cheesecake individually in plastic wrap, then place them in a freezer bag. They can be frozen for up to 2 months. When you’re ready to enjoy, simply thaw them in the refrigerator overnight.
Tips and Advice
Make sure all your ingredients are at room temperature before starting. This helps everything mix together smoothly and evenly. Also, don’t overmix the cheesecake batter—this can lead to a dense, tough texture. Mix until just combined for a light, creamy result.
Presentation Tips
For a festive touch, top each mini cheesecake with a dollop of whipped cream and a sprinkle of cocoa powder. Alternatively, you can add a fresh raspberry or a drizzle of chocolate sauce. This not only enhances the flavor but also makes them look visually appealing.
Healthier Alternative Recipes
If you’re looking for a healthier twist on this classic, here are six variations to try:
- Fruit-Topped Cheesecakes: Swap the red food coloring for natural fruit purees like beetroot or pomegranate to give the brownie base a vibrant, natural color. Top with fresh berries for a burst of freshness.
- Greek Yogurt Cheesecake Filling: Substitute the cream cheese with Greek yogurt for a lighter, tangier cheesecake layer. This reduces the fat content and adds a subtle tanginess.
- Low-Sugar Option: Use a sugar substitute like stevia or erythritol to reduce the overall sugar content. This makes the dessert a bit healthier without sacrificing too much sweetness.
- Whole Grain Brownie Base: Replace the all-purpose flour with whole grain flour to add more fiber and nutrients. This gives the brownie a slightly nuttier flavor and a denser texture.
- Vegan Version: Use vegan cream cheese and plant-based eggs to make this recipe entirely plant-based. You can also use a vegan-friendly butter for the brownie base.
- Mini Cheesecake Bites with Oats: Add a small amount of rolled oats to the brownie base for a bit of crunch and added nutrition. This makes the dessert heartier and more satisfying.
For more delicious recipes, check out the Raspberry White Chocolate Delight, Raspberry Vodka Bliss, Raspberry Mousse Delight, and Raspberry Mascarpone Log.
Common Mistakes to Avoid
Mistake 1: Overbaking the Cheesecakes
Cheesecakes should be slightly jiggly in the center when taken out of the oven. Overbaking can cause them to crack and become dry. Stick to the baking time and use a toothpick to check the center. If it comes out clean but slightly wet, they’re done.
Mistake 2: Not Letting Them Cool Completely
Patience is key! Letting the cheesecakes cool completely in the pan before removing them helps them set properly and prevents them from breaking. This also ensures a cleaner, more presentable dessert.
Mistake 3: Using Cold Ingredients
Using cold ingredients, especially cream cheese and eggs, can result in a lumpy, uneven cheesecake layer. Make sure all your ingredients are at room temperature before mixing. This ensures a smooth, creamy texture.
Mistake 4: Too Much Food Coloring
While a vibrant red color is desirable, too much food coloring can overpower the flavor and make the brownie base overly bright. Start with a small amount and adjust as needed. Gel food coloring is a great choice for vibrant, natural-looking colors.
Mistake 5: Not Lining the Muffin Tin
Lining the muffin tin with paper liners or greasing it well is crucial. This makes it easier to remove the cheesecakes after baking and cooling. Neglecting this step can lead to a messy, frustrating experience.
FAQ
Can I use a different type of food coloring?
Yes, you can use different types of food coloring. Gel food coloring is recommended for a more vibrant and less diluted effect. Just start with a small amount and adjust as needed to avoid overpowering the flavor.
Can I make this recipe gluten-free?
Absolutely! You can use a gluten-free all-purpose flour blend in place of regular flour. This will make the brownie base gluten-free, and the rest of the recipe remains the same. Just make sure any other ingredients you use, like the cream cheese, are also gluten-free.
How long do these mini cheesecakes last?
Stored in an airtight container in the refrigerator, these mini cheesecakes will last for up to 5 days. For longer storage, you can freeze them. Wrap each cheesecake individually in plastic wrap, then place them in a freezer bag. They can be frozen for up to 2 months. Thaw them in the refrigerator overnight before serving.
Can I make the brownie base and cheesecake layer in advance?
Yes, you can prepare the brownie base and the cheesecake layer in advance. Store them separately in the refrigerator for up to 24 hours. When you’re ready to bake, simply assemble and bake as directed. This can save you time and make the process easier.
What if I don’t have a 12-cup muffin tin?
No problem! You can use a 6-cup jumbo muffin tin or a 24-cup mini muffin tin. Adjust the baking time accordingly. Jumbo muffins may take a few minutes longer, while mini muffins will take less time. Keep an eye on them to ensure they don’t overbake.
Can I use a different type of cheese for the cheesecake layer?
While cream cheese is the traditional choice for cheesecakes, you can experiment with other types of soft cheese like mascarpone or ricotta. Just keep in mind that the texture and flavor will be slightly different. Mascarpone, for example, will give a richer, creamier consistency, while ricotta will be a bit grainier.
How do I know when the cheesecakes are done?
When the cheesecakes are done, they should be set around the edges but still slightly jiggly in the center. Overbaking can cause them to crack and become dry. Test the center with a toothpick; it should come out clean but slightly wet. This indicates they are done and will set perfectly as they cool.