
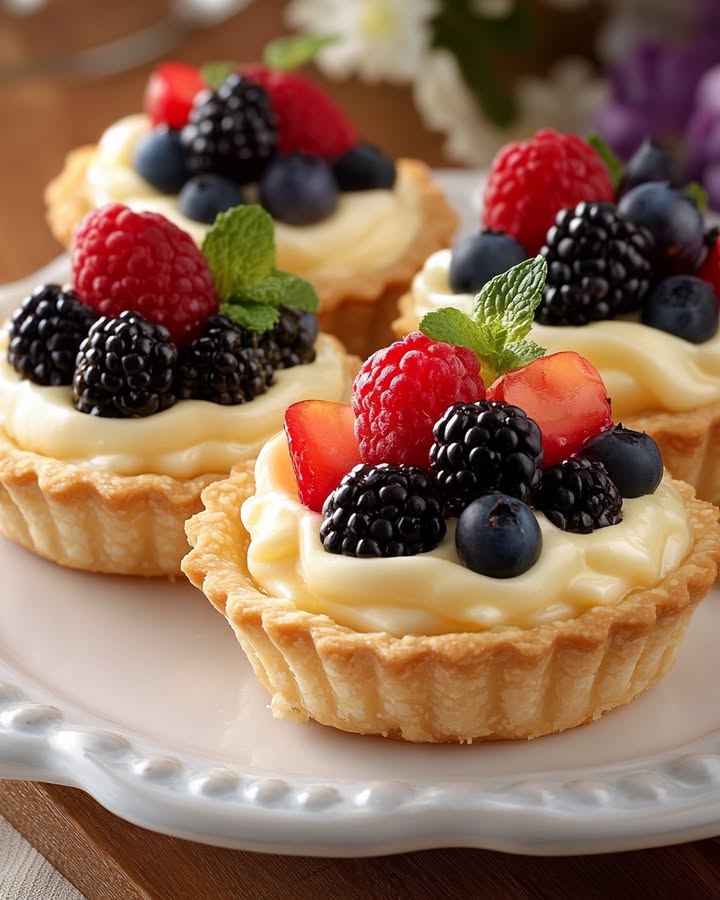
Why Mini Fruit Tarts Are the Perfect Treat for Any Occasion
There’s something about a perfectly crafted mini fruit tart that just makes you smile. These little beauties are not only adorable but also a delight to the taste buds. I first made these tarts for a family gathering, and ever since, they’ve become a staple at our table. Let’s dive into why these mini fruit tarts are so special and how you can make them in your own kitchen.
The History and Background of Mini Fruit Tarts
Mini fruit tarts have a rich history, originating from French patisseries. They were originally an elegant and sophisticated dessert served at high-end restaurants. Over time, they’ve become a beloved treat found in bakeries and homes around the world. The modern version combines a flaky, buttery crust, a creamy filling, and a colorful array of fresh fruits. It’s a delightful blend of tradition and innovation, making it a perfect choice for any occasion.
Why You’ll Love This Recipe
This recipe for mini fruit tarts is a real crowd-pleaser. The combination of the smooth, vanilla-flavored pastry cream, the crisp, buttery crust, and the vibrant, fresh fruits is simply irresistible. Plus, it’s surprisingly easy to put together, even for those who aren’t seasoned bakers. The best part? You can get creative with the fruit toppings, using whatever is in season or your favorite flavors.
Perfect Occasions to Prepare Mini Fruit Tarts
Whether it’s a baby shower, a birthday party, or a casual afternoon tea, mini fruit tarts always steal the show. Their small size makes them perfect for snacking, and their elegant appearance adds a touch of sophistication to any event. I love making these for my daughter’s school events and for potlucks with friends. They’re always a hit!
Ingredients
- For the Italian Pastry Cream:
- 1 cup (354 ml) whole milk
- A strip of lemon rind
- 3 egg yolks
- ½ cup (66 g) granulated sugar
- ¼ cup (30 g) all-purpose flour
- 1 teaspoon vanilla extract
- For the Tartlet Crust:
- 4 oz (120 g) unsalted butter at room temperature
- ½ cup (66 g) granulated sugar
- 1 teaspoon finely grated lemon zest
- 1 egg at room temperature
- 2 cups (250 g) all-purpose flour
- A pinch of salt
- For the Fruit Tart Glaze:
- 1 tablespoon apricot jam or conserve
- Water as needed
- For the Fruit Topping:
- 4 oz (115 g) blueberries
- 4 oz (115 g) raspberries
- 2 kiwi fruits
Substitution Options
If you’re looking to mix things up, here are some substitution options:
- Whole milk: You can use almond milk or any other non-dairy milk for a vegan option.
- Fruit: Feel free to use your favorite fruits like strawberries, blackberries, or even peaches.
- Butter: You can substitute the butter with coconut oil for a dairy-free crust.
Preparation Section
Step 1: Make the Italian Pastry Cream
Start by heating the whole milk and a strip of lemon rind in a saucepan until it’s hot but not boiling. In a separate bowl, whisk the egg yolks, sugar, and flour until smooth. Slowly whisk in the hot milk and vanilla extract. Return the mixture to the saucepan and whisk over medium heat until it thickens. Simmer for about 1 minute, then let it cool in the fridge until it’s cold.
Step 2: Make the Tartlet Crusts
Beat the unsalted butter until it’s creamy. Add the granulated sugar and finely grated lemon zest, then beat in the egg. Stir in the all-purpose flour and a pinch of salt. Knead the dough lightly until it’s smooth. Wrap the dough and chill it for 30 minutes. After chilling, roll out the dough, cut circles, and line your mini tart pans. Freeze the lined pans for 30 minutes before baking at 350ºF (180ºC) for 12-14 minutes until golden. Let the crusts cool completely.
Step 3: Prepare the Fruit Tart Glaze
Heat the apricot jam in the microwave and strain it to remove any chunks. This will give you a smooth, glossy glaze. Brush the glaze onto the fruit for a beautiful, shiny finish.
Step 4: Assemble the Tarts
Fill the cooled tart shells with the chilled pastry cream. Top with a variety of fresh fruits, such as blueberries, raspberries, and sliced kiwi. Brush the fruit with the glaze for added shine. Chill the tarts until you’re ready to serve.
Pro tip: For an extra burst of flavor, add a sprinkle of cinnamon or a dash of lemon juice to the fruit topping.
Chef’s Tip: Add a Secret Ingredient
For an unexpected twist, try adding a small amount of orange zest to the pastry cream. It gives a subtle, refreshing note that complements the fruits beautifully.
Timing
Here’s a breakdown of the time you’ll need:
- Prep time: 1 hour
- Cooking time: 12-14 minutes
- Resting/Chilling time: 1 hour 30 minutes
- Total time: 2 hours 45 minutes
Chef’s Secret: A Unique Trick
To make your tart shells extra crispy, brush them with a beaten egg white before baking. This creates a barrier that helps prevent the pastry cream from making the crust soggy.
Extra Info: An Interesting Anecdote
Did you know that the first documented recipe for a fruit tart dates back to the 16th century? It was a simple yet elegant dessert made with a pastry crust and filled with seasonal fruits. Since then, the recipe has evolved, and now we have these delectable mini versions that are a joy to both make and eat.
Necessary Equipment
To make these mini fruit tarts, you’ll need the following equipment:
- Mixing bowls
- Saucepan
- Whisk
- Rolling pin
- Mini tart pans
- Pastry brush
Storage
Storing your mini fruit tarts is essential to keep them fresh and delicious. Here’s how to do it. First, make sure the tarts are fully cooled before storing them. Place them in an airtight container and store them in the refrigerator. They will stay fresh for up to 2 days. If you want to freeze them, do so without the fruit topping. Store the unfilled tart shells in a freezer-safe bag and the pastry cream in a separate container. When you’re ready to serve, thaw them, fill with the cream, and top with fresh fruits.
Tips and Advice
To ensure the best results, here are some tips and advice:
- Use room-temperature ingredients for the pastry cream and tart crust to ensure even mixing.
- When cutting the dough, use a sharp cookie cutter to get clean edges.
- Feel free to experiment with different fruits and combinations to find your favorite flavor profile.
Presentation Tips
Make your mini fruit tarts look even more appealing with these presentation ideas:
- Arrange the fruits in a pattern, like a flower or a spiral, for a visually stunning effect.
- Garnish the tarts with a sprig of mint or a dusting of powdered sugar for an extra touch of elegance.
- Use a piping bag to create a decorative border of whipped cream around the edge of each tart.
Healthier Alternative Recipes
If you’re looking for a healthier twist on this classic, here are six variations you might enjoy:
- Mini Vegan Fruit Tarts: Replace the whole milk with almond milk and use a vegan butter for the crust. Top with a variety of fresh, seasonal fruits.
- Gluten-Free Mini Fruit Tarts: Use a gluten-free flour blend for the crust and ensure all other ingredients are gluten-free. The result is a delicious, allergy-friendly treat.
- Low-Sugar Mini Fruit Tarts: Substitute the granulated sugar with a natural sweetener like stevia or honey. This version is great for those watching their sugar intake.
- Mini Cheesecake Fruit Tarts: Instead of the traditional pastry cream, use a light, creamy cheesecake filling. Check out our Mini Cheesecake Brûlées recipe for inspiration.
- Mini Fruit Tarts with Nutty Crust: Add a nutty twist by incorporating ground almonds or walnuts into the crust. This adds a lovely texture and flavor.
- Mini Fruit Tarts with Chia Pudding Filling: Replace the pastry cream with a chia pudding. It’s a nutritious and delicious alternative that works well with the fresh fruits.
Common Mistakes to Avoid
Mistake 1: Over-whisking the Egg Yolks
Over-whisking the egg yolks can lead to a grainy and lumpy pastry cream. To avoid this, whisk the yolks, sugar, and flour until just combined and smooth. Adding the hot milk gradually will help achieve a silky texture.
Mistake 2: Not Chilling the Dough Enough
Not chilling the dough long enough can result in a crumbly and tough crust. Make sure to chill the dough for at least 30 minutes before rolling it out. This step is crucial for achieving a flaky, buttery crust.
Mistake 3: Overfilling the Tart Shells
Overfilling the tart shells can cause the pastry cream to overflow and make the tarts messy. Fill each shell with a generous but controlled amount of pastry cream, leaving enough space for the fruit topping. This ensures a neat and visually appealing presentation.
Mistake 4: Using Too Much Glaze
Using too much glaze can make the tarts overly sweet and mask the natural flavors of the fruits. Apply a thin, even layer of glaze to enhance the shine without overpowering the fruits. This keeps the balance of flavors just right.
Mistake 5: Not Freezing the Lined Tart Pans
Skipping the step of freezing the lined tart pans can result in misshapen or unevenly baked tart shells. Freezing the lined pans for 30 minutes before baking helps the dough hold its shape and bake evenly, resulting in perfect, golden-brown tarts.
FAQ
Can I use different fruits for the topping?
Absolutely! The beauty of mini fruit tarts is that you can use any fruits you like. Try a combination of strawberries, peaches, or even kiwi for a colorful and flavorful arrangement.
Can I make the pastry cream ahead of time?
Yes, you can make the pastry cream ahead of time. Just be sure to cover it with plastic wrap, pressing the wrap directly onto the surface to prevent a skin from forming. Store it in the refrigerator for up to 2 days.
How do I make the crust dairy-free?
To make the crust dairy-free, you can substitute the butter with coconut oil or a dairy-free margarine. This will give you a similar texture and flavor without the dairy.
Can I make the tarts larger?
Of course! You can make the tarts in larger sizes if you prefer. Just adjust the baking time accordingly. Larger tarts may take a few extra minutes to bake, so keep an eye on them to ensure they don’t burn.
What if I don’t have mini tart pans?
If you don’t have mini tart pans, you can use a muffin tin or even small ramekins. Just make sure to adjust the baking time and keep an eye on them to ensure they bake evenly.
How do I prevent the pastry cream from making the crust soggy?
To prevent the pastry cream from making the crust soggy, make sure the shells are completely cooled before adding the cream. You can also brush the inside of the shells with a beaten egg white before baking. This creates a barrier between the crust and the cream.
How long can I store the tarts?
You can store the tarts in an airtight container in the refrigerator for up to 2 days. If you want to keep them longer, you can freeze the unfilled tart shells and the pastry cream separately. Thaw and assemble when you’re ready to serve.
Can I make the tarts nut-free?
Yes, you can easily make the tarts nut-free. Just ensure that all your ingredients are free from nuts, and there are no traces of nuts in your kitchen. This is especially important if you or someone you’re serving has a nut allergy.
Can I use a different type of milk for the pastry cream?
Yes, you can use almond milk, soy milk, or any other non-dairy milk for the pastry cream. Just make sure the milk is unsweetened and unflavored to avoid altering the taste.
How do I make the fruit tart glaze?
To make the fruit tart glaze, heat apricot jam in the microwave and strain it to remove any chunks. This will give you a smooth, glossy glaze. Brush the glaze onto the fruit for a beautiful, shiny finish.
Now that you’ve mastered the art of making mini fruit tarts, I hope you feel inspired to create your own delicious versions. Don’t forget to check out our other delightful recipes like the Melting Belgian Ganache and Marble Cake Delight for more sweet treats. Happy baking!
Mini Fruit Tarts
Ingredients
Equipment
Method
- Heat the whole milk and lemon rind in a saucepan until hot but not boiling.
- In a separate bowl, whisk egg yolks, sugar, and flour until smooth.
- Slowly whisk in the hot milk and vanilla extract.
- Return the mixture to the saucepan and whisk over medium heat until thick.
- Let the pastry cream cool in the fridge until cold.
- Beat the unsalted butter until creamy, then add sugar and lemon zest, followed by the egg.
- Stir in the flour and a pinch of salt, knead lightly, and chill the dough for 30 minutes.
- Roll out the dough, cut circles, and line mini tart pans, then freeze for 30 minutes.
- Bake at 350ºF (180ºC) for 12-14 minutes until golden and cool completely.
- Heat apricot jam, strain it, and brush onto the fruit for glaze.
- Fill cooled tart shells with pastry cream and top with assorted fresh fruits.
- Brush the fruits with glaze and chill the tarts until ready to serve.