
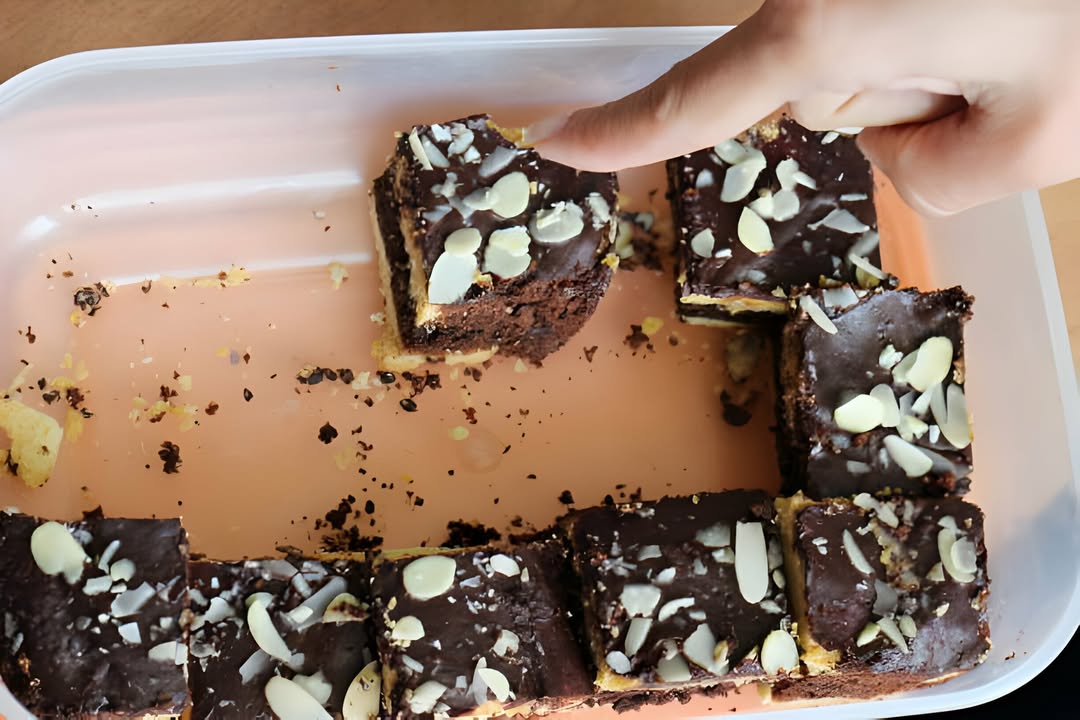
Welcome to the Magic of Nostalgic Chocolate Brownies!
Hello, sweet friends! Ready to take a delicious trip down memory lane? These Lunch Lady Brownies are just like the ones served in school cafeterias—moist, chocolatey, and utterly irresistible. But guess what? This homemade version might just be even better! Perfect for satisfying your sweet tooth or bringing a smile to any gathering. Let’s whip up a batch of these delightful treats!
A Taste of Nostalgia: The History and Background
Do you remember those days in elementary school when the lunch lady would serve up the most delectable brownies? I sure do! Every time I made these, it took me right back to my childhood. The rich, fudgy texture and deep chocolate flavor were something I looked forward to every week. Now, I get to recreate that magic in my kitchen and share it with my family and friends. These brownies have a special place in my heart, and I’m excited to pass on this nostalgic treat.
Why You’ll Love These Nostalgic Chocolate Brownies
– **Deep chocolate flavor in every bite!**
– **Moist and fudgy, just like you remember!**
– **Perfect for parties, picnics, or a cozy night in!**
These brownies are not just a treat; they’re a trip down memory lane. The rich, chocolatey goodness and the smiles they bring make them a hit with both kids and adults. Plus, they’re super easy to make, so you can whip them up anytime you need a sweet pick-me-up.
Perfect Occasions to Prepare This Recipe
– **School reunions:** Relive those school days with your old classmates.
– **Birthday parties:** Add a touch of nostalgia to any celebration.
– **Family gatherings:** Treat your loved ones to a taste of the past.
– **Potlucks and picnics:** Watch them disappear in no time!
Ingredients
– Butter 1 cup, melted
– Unsweetened Cocoa Powder 1/2 cup
– All-Purpose Flour 2 cups
– Granulated Sugar 2 cups
– Large Eggs 4
– Vanilla Extract 4 teaspoons
For the Chocolate Frosting
– Butter 1/4 cup, softened
– Milk 1/4 cup, I use 2%
– Unsweetened Cocoa Powder 1/4 cup
– Powdered Sugar 3 cups
Substitution Options
– **Butter:** You can use coconut oil or vegetable oil if you prefer.
– **Milk:** Almond milk or soy milk work well as dairy-free alternatives.
– **Flour:** For a gluten-free option, try using almond flour or a gluten-free all-purpose blend.
Preparation Section
Step 1: Preheat and Prep
Preheat your oven to 350°F (175°C) and prep a 9×13-inch baking dish with foil and non-stick spray. Make sure your oven is at the right temperature before you start mixing the ingredients. This ensures even baking and a perfect texture.
Step 2: Blend the Wet Ingredients
Blend the melted butter and cocoa powder until smooth. The mixture should be thick and glossy. It’s a good idea to use a whisk to get rid of any lumps. The rich, dark color is a sign that you’re on the right track.
Step 3: Mix in the Dry Ingredients
Add the flour, sugar, eggs, and vanilla to the wet ingredients. Mix just until combined. The batter will be thick and fudgy. Be careful not to overmix, as this can make the brownies tough. The key is to get a smooth, uniform consistency without overworking the batter.
Step 4: Bake and Stand
Pour the thick batter into the prepared dish and bake for 25-30 minutes. The brownies should be set but still slightly fudgy in the center. Let them stand for 15 minutes before frosting. This allows the brownies to cool slightly and makes them easier to frost.
Step 5: Make the Frosting
While the brownies are cooling, prepare the frosting. Beat the butter, milk, cocoa powder, and powdered sugar until smooth. The frosting should be creamy and spreadable. If it’s too thick, add a little more milk. If it’s too thin, add a bit more powdered sugar.
Step 6: Frost and Enjoy
Spread the frosting over the warm brownies. The warmth will help the frosting melt a little, creating a smooth, glossy finish. Let the brownies cool completely before slicing. Serve and watch them disappear!
Chef’s Tip
Pro Tip: To enhance the chocolate flavor, add a pinch of salt to the batter. The salt brings out the richness of the chocolate and adds a subtle depth to the overall flavor.
Timing
– **Prep Time:** 10 minutes
– **Cooking Time:** 25-30 minutes
– **Resting Time:** 15 minutes
– **Total Time:** 50-55 minutes
Chef’s Secret
To make the brownies extra fudgy, replace 1/2 cup of the all-purpose flour with an equal amount of unsweetened cocoa powder. This gives the brownies a deeper, richer chocolate flavor and a more decadent texture.
Extra Info
Did you know that the original Lunch Lady Brownies were often made with simple, wholesome ingredients? They were a staple in school cafeterias because they were easy to make in large quantities and always a favorite among students. This recipe captures that simplicity and nostalgia, making it a perfect treat for any occasion.
Necessary Equipment
– 9×13-inch baking dish
– Mixing bowls
– Whisk or electric mixer
– Measuring cups and spoons
– Aluminum foil
– Non-stick spray
Storage
– **Room Temperature:** Store the brownies in an airtight container at room temperature for up to 5 days.
– **Refrigerator:** For longer storage, keep them in the refrigerator for up to 1 week. The frosting will firm up, adding a different but equally delicious texture.
– **Freezer:** Freeze the brownies for up to 3 months. Wrap them tightly in plastic wrap and place in a freezer bag. Thaw at room temperature before serving.
Tips and Advice
– **Check for Doneness:** Insert a toothpick into the center of the brownies. If it comes out with a few moist crumbs, they’re done. If it’s clean, they may be overcooked.
– **Cooling:** Allowing the brownies to cool slightly before frosting helps the frosting adhere better and prevents it from melting too much.
– **Frost While Warm:** Frost the brownies while they’re still warm. This helps the frosting melt slightly and creates a smooth, even layer.
Presentation Tips
– **Garnish with Nuts:** Sprinkle chopped nuts like walnuts or pecans over the frosting for added texture and flavor.
– **Dust with Powdered Sugar:** For a fancy touch, dust the top of the brownies with a light layer of powdered sugar.
– **Add a Scoop of Ice Cream:** Serve a warm brownie with a scoop of vanilla ice cream for a classic, indulgent dessert.
Healthier Alternative Recipes
– **Whole Wheat Brownies:** Replace 1/2 cup of all-purpose flour with whole wheat flour for a healthier twist.
– **Avocado Brownies:** Use mashed avocado instead of some of the butter for a boost of healthy fats.
– **Zucchini Brownies:** Add grated zucchini to the batter for a hidden veggie treat.
– **Date-Sweetened Brownies:** Substitute granulated sugar with pureed dates for a natural sweetness.
– **Coconut Oil Brownies:** Use coconut oil instead of butter for a dairy-free option.
– **Oatmeal Brownies:** Add 1/2 cup of rolled oats to the batter for a chewy, nutty texture.
Common Mistakes to Avoid
Mistake 1: Overcooking the Brownies
Overcooking is a common mistake that can turn your brownies dry and crumbly. To avoid this, check the brownies at the 25-minute mark and continue to test every minute until they’re just set. A toothpick inserted into the center should come out with a few moist crumbs, not clean.
Mistake 2: Not Measuring Ingredients Accurately
Using the right measurements is crucial. Too much flour can make the brownies dense, while too little can make them fall apart. Use a kitchen scale for the best results. If you don’t have one, measure by spooning the ingredient into the measuring cup and leveling it off with a knife.
Mistake 3: Overmixing the Batter
Mixing the batter too much can develop the gluten in the flour, leading to tough, chewy brownies. Mix the ingredients just until they are combined. A few lumps are okay and will melt away during baking.
Mistake 4: Using Cold Ingredients
Make sure all your ingredients are at room temperature, especially the butter and eggs. Cold ingredients can cause the batter to clump and won’t mix as smoothly. Letting them sit out for about 30 minutes before starting is a good practice.
Mistake 5: Not Cooling Before Frosting
If you frost the brownies while they’re too hot, the frosting can melt and become runny. Let the brownies cool for about 15 minutes before frosting. This will give the frosting a chance to set and create a smooth, even layer.
FAQ
Can I use margarine instead of butter?
You can use margarine, but it won’t give the same rich, buttery flavor. If you do use margarine, choose one with a high fat content for the best results.
How long can I store the brownies?
Store the brownies in an airtight container at room temperature for up to 5 days, in the refrigerator for up to 1 week, or in the freezer for up to 3 months.
Can I make these brownies gluten-free?
Yes, you can use a gluten-free all-purpose flour blend or almond flour as a substitute for regular flour. Just make sure to follow the instructions on the package for best results.
What can I use instead of milk in the frosting?
You can use almond milk, soy milk, or any other non-dairy milk as a substitute. Just make sure it’s at room temperature for the best consistency.
Can I add nuts to the brownies?
Absolutely! Adding chopped nuts like walnuts or pecans can give the brownies a nice crunch and added flavor. Fold them into the batter before baking.
Can I make these brownies without eggs?
You can try using applesauce or a commercial egg replacer. Use 1/4 cup of unsweetened applesauce per egg. The texture might be slightly different, but they should still be delicious.
What’s the best way to cut the brownies?
Let the brownies cool completely before cutting. Use a sharp knife and dip it in hot water between cuts for clean, neat slices.
Can I make these brownies ahead of time?
Yes, you can make the brownies a day or two in advance. Just store them in an airtight container and frost them on the day you plan to serve them.
Is there a way to make the frosting less sweet?
If you find the frosting too sweet, you can reduce the amount of powdered sugar or add a bit more cocoa powder. You can also add a pinch of salt to balance the sweetness.
Can I use a different type of chocolate?
You can use different types of unsweetened cocoa powder or even dark chocolate for a deeper, richer flavor. Just make sure to adjust the sugar accordingly.
Conclusion
These Nostalgic Chocolate Brownies are a true delight, bringing back memories of school lunches and carefree days. Whether you’re sharing them with family and friends or enjoying them as a cozy night in treat, they’re sure to bring a smile to everyone’s face. So, why not roll up your sleeves and start baking? And if you’re looking for more delectable desserts, check out our Nantes Rum Almond Delight, Naked Caramel Bars, Moist Chocolate Ganache, and Mississippi Mud Brownies. Happy baking!
Nostalgic Chocolate Brownies
Ingredients
Equipment
Method
- Preheat your oven to 350°F (175°C) and prep a 9x13-inch baking dish with foil and non-stick spray.
- Blend the melted butter and cocoa powder until smooth, using a whisk to remove any lumps.
- Add the flour, sugar, eggs, and vanilla to the wet ingredients and mix just until combined, being careful not to overmix.
- Pour the batter into the prepared dish and bake for 25-30 minutes until set but slightly fudgy in the center, then let them stand for 15 minutes before frosting.
- While the brownies cool, prepare the frosting by beating together the butter, milk, cocoa powder, and powdered sugar until smooth.
- Spread the frosting over the warm brownies and let them cool completely before slicing.