
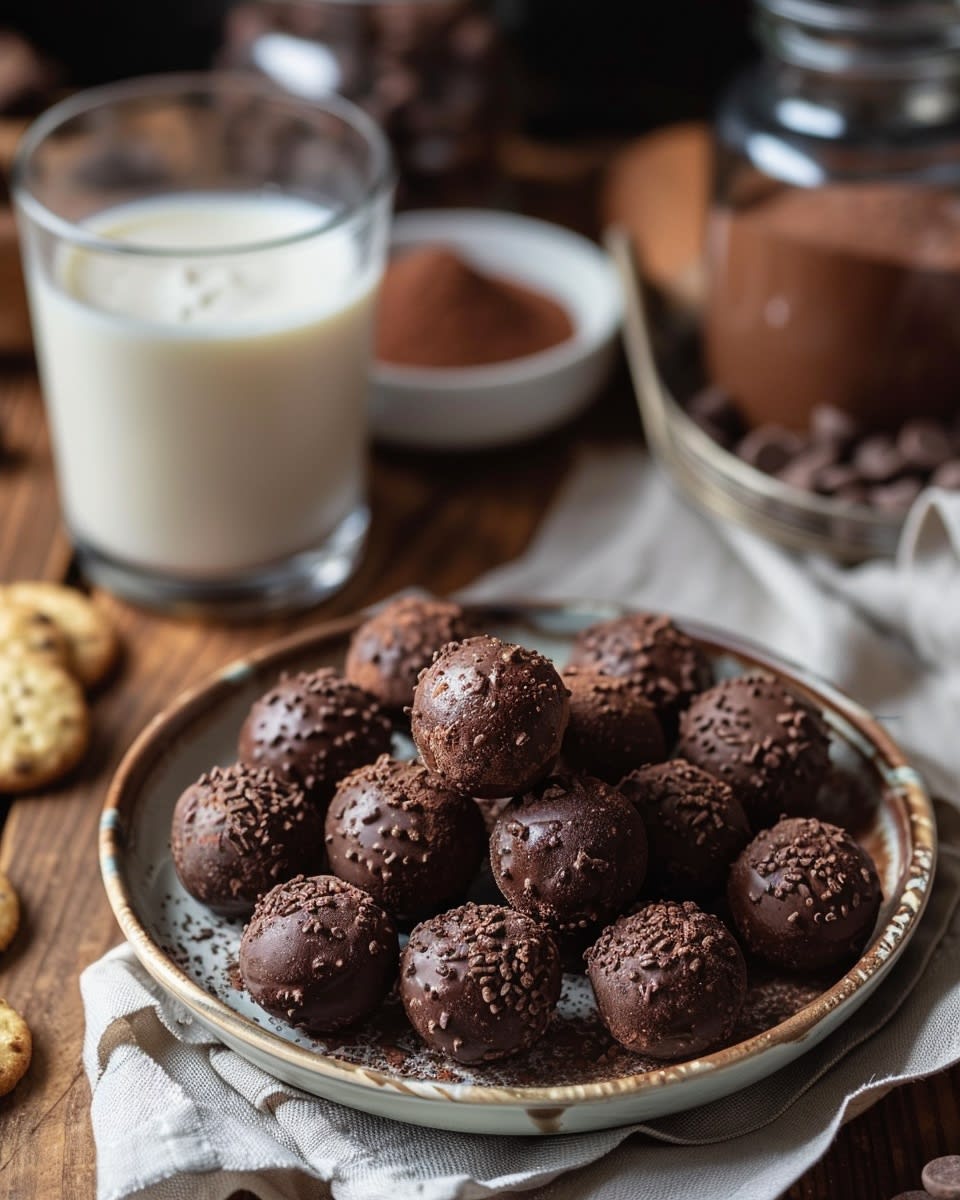
Welcome to the Wonderful World of No-Bake Chocolate Delights
Just last week, my little one asked me for a chocolate treat, and let’s be honest, who can resist? But with a busy day ahead, I knew I needed something quick and easy. That’s when I remembered the magic of No-Bake Chocolate Delights. These little gems are not only a lifesaver but also a hit with kids and adults alike. They’re perfect for those moments when you crave something sweet but don’t want to spend hours in the kitchen.
A Brief History of No-Bake Chocolate Delights
These delightful treats have been around for quite some time, but their exact origin is a bit of a mystery. Some say they were born out of necessity during the Great Depression, where finding creative ways to use limited ingredients was key. Others believe they came from the clever minds of busy homemakers who wanted to whip up something sweet without the fuss. Regardless of where they came from, these no-bake wonders have evolved into a beloved treat that’s perfect for any occasion.
Why You’ll Love This Recipe
No-Bake Chocolate Delights are a dream come true for anyone who loves chocolate but wants to keep things simple. They’re incredibly easy to make, require no baking (obviously), and are packed with rich, decadent flavors. Plus, they’re versatile, so you can add your favorite mix-ins like nuts, dried fruits, or even a sprinkle of sea salt for that extra zing.
Perfect Occasions to Prepare This Recipe
These no-bake delights are perfect for any gathering, whether it’s a family movie night, a birthday party, or even a quick snack for the kids after school. I’ve made them for potlucks, holiday gatherings, and even as a special treat for my friends. They always disappear quickly, and everyone loves them!
Ingredients
- 1 cup graham cracker crumbs
- 1 cup unsalted butter, melted
- 1 cup powdered sugar
- 1/2 cup cocoa powder
- 1 teaspoon vanilla extract
- 1 1/2 cups shredded coconut
- 1 cup chopped nuts (pecans, walnuts, or almonds)
Substitution Options
- Graham cracker crumbs: You can use crushed cookies or pretzels instead.
- Butter: Coconut oil or margarine works well if you’re avoiding dairy.
- Powdered sugar: Granulated sugar can be used, but it will make the mixture a bit grainier.
- Cocoa powder: If you prefer, you can use dark cocoa powder for a richer flavor.
- Vanilla extract: Try using almond or peppermint extract for a different twist.
- Shredded coconut: Omit it if you’re not a fan, or use oatmeal for a different texture.
- Nuts: Use seeds like sunflower or pumpkin if you have nut allergies.
Preparation Section
Step 1: Mix the Base
Start by mixing the graham cracker crumbs, melted butter, powdered sugar, and cocoa powder in a large bowl. The mixture should be smooth and slightly sticky. This is the base that will hold everything together, so make sure it’s well combined. The rich, chocolatey aroma will already start to fill your kitchen, making your mouth water.
Step 2: Add the Flavors
Next, stir in the vanilla extract, shredded coconut, and chopped nuts. The vanilla will add a subtle, sweet aroma, while the coconut and nuts will give texture and a bit of crunch. This step is where you can get creative and add your favorite mix-ins. The more you stir, the more the flavors will meld together, creating a deliciously cohesive mixture.
Step 3: Form the Balls
Now, it’s time to get hands-on! Using a small cookie scoop or a tablespoon, form the mixture into small balls. Roll each ball gently with your hands to make sure they’re evenly shaped. The texture should be firm enough to hold its shape but still soft and pliable. Place the balls on a baking sheet lined with parchment paper for easy cleanup.
Step 4: Chill and Serve
Once all the balls are formed, place the baking sheet in the refrigerator and let them chill for at least an hour. This step is crucial as it allows the chocolate balls to set and become firm. When you take them out, they’ll be perfectly bite-sized and ready to enjoy. You can serve them as is, or roll them in more coconut, cocoa powder, or sprinkles for a fun, festive touch.
Pro Tip:
If you find the mixture too crumbly, add a bit more melted butter or a splash of milk to help it come together. Conversely, if it’s too sticky, add a bit more graham cracker crumbs or cocoa powder to balance it out.
Chef’s Tip:
For an extra special touch, hide a small piece of chocolate or a peanut butter M&M inside each ball before chilling. It’s a delightful surprise that makes these treats even more irresistible.
Timing
The prep time for this recipe is about 15 minutes, and there’s no cooking time involved. The key is the chilling time, which is at least 1 hour. So, from start to finish, you’re looking at about 1 hour and 15 minutes total. It’s a quick and easy process that’s perfect for those busy days.
Chef’s Secret
One of my favorite tricks is to use a mini ice cream scoop to form the balls. This not only makes the process faster but also ensures that each ball is the same size, giving you a professional and polished look. Plus, it’s a great way to involve the kids, as they love helping with the scooping and rolling.
Extra Info
Did you know that graham crackers were originally created as a health food? They were developed in the 19th century by a Presbyterian minister named Sylvester Graham, who believed in a strict vegetarian diet. Who would have thought that such a humble cracker would become a key ingredient in so many delicious desserts?
Necessary Equipment
- Large mixing bowl
- Spatula
- Small cookie scoop or tablespoon
- Baking sheet
- Parchment paper
- Measuring cups and spoons
Storage
These No-Bake Chocolate Delights are best stored in an airtight container in the refrigerator. They’ll stay fresh for about 5-7 days, but honestly, they never last that long in my house! The cool temperature helps to keep them firm and prevents the chocolate from becoming too soft. If you want to make them ahead of time, you can also freeze them. Just place them in a single layer on a baking sheet and freeze until solid, then transfer them to a freezer-safe container. They’ll last for up to 2 months in the freezer. Perfect for those last-minute cravings!
Tips and Advice
- Use room-temperature ingredients for the best results. This will help the mixture come together more smoothly.
- Feel free to experiment with different add-ins. Dried fruits, different types of nuts, or even a few chocolate chips can add a unique twist.
- Don’t skip the chilling time. It’s essential for the balls to set and hold their shape.
Presentation Tips
- Roll the balls in different toppings like cocoa powder, shredded coconut, or sprinkles for a colorful and festive look.
- Place them on a decorative platter or in cute little cupcake liners for a lovely presentation.
- Add a drizzle of melted chocolate or caramel over the top for an extra indulgent touch.
Healthier Alternative Recipes
If you’re looking to make these No-Bake Chocolate Delights a bit healthier, here are six delicious variations to try:
- Almond Butter Energy Bites: Replace the butter with almond butter and use honey instead of powdered sugar. Add in some chia seeds and oats for a nutritious boost. These bites are perfect for a quick energy pick-me-up.
- Dairy-Free Delights: Use coconut oil instead of butter and coconut cream in place of the powdered sugar. Add in some crushed pecans and sea salt for a delicious, dairy-free treat.
- Fruit and Nut Balls: Swap out the graham cracker crumbs for finely chopped dates and add in a variety of nuts and dried fruits. These are naturally sweet and full of fiber and protein.
- Avocado Chocolate Delights: Believe it or not, adding mashed avocado to the mixture can make these treats incredibly creamy and rich. The avocado adds healthy fats and a smooth texture. Use cocoa powder and maple syrup for a natural sweetness.
- Oatmeal Cookie Balls: Replace the graham cracker crumbs with rolled oats and use a combination of honey and peanut butter for a chewy, oatmeal cookie-like texture. Add in some chocolate chips or raisins for a classic touch.
- Matcha Green Tea Balls: For a unique twist, add matcha green tea powder to the mixture along with white chocolate chips and pistachios. These not only taste amazing but also provide a boost of antioxidants.
If you’re a fan of brownies, you might also enjoy our Sweet Potato Brownies or our Protein-Packed Brownies. They’re both delicious and a great way to satisfy your sweet tooth without the guilt. And if you’re following a keto diet, our Keto Brownies Delight is a must-try.
Common Mistakes to Avoid
Mistake 1: Overmixing the Ingredients
Overmixing can lead to a dough that’s too dense and hard to form into balls. The key is to mix just until the ingredients are well combined. If you notice the mixture becoming too dry, add a bit more melted butter or a splash of milk to help it come together.
Mistake 2: Not Chilling Long Enough
Chilling is crucial for these no-bake treats. If you don’t chill them long enough, they won’t set properly and will be too soft and messy to handle. Make sure to chill them for at least an hour to ensure they hold their shape. Patience is a virtue, and it pays off with these delicious treats!
Mistake 3: Using Old or Rancid Nuts
Using old or rancid nuts can completely ruin the flavor of your No-Bake Chocolate Delights. Always check the freshness of your nuts before using them. Fresh nuts will give your treats a rich, nutty flavor that complements the chocolate perfectly. If you’re unsure, it’s better to err on the side of caution and use new ones.
Mistake 4: Adding Too Much Liquid
Adding too much liquid, like extra butter or milk, can make the mixture too wet and difficult to form into balls. Start with a little and add more as needed. The mixture should be just moist enough to hold together but not overly wet. Trust your instincts and adjust as you go.
FAQ
Can I use other types of crackers instead of graham crackers?
Yes, you can use other types of crackers like crushed cookies or pretzels. Just make sure the crumbs are finely ground for the best texture.
Are these No-Bake Chocolate Delights gluten-free?
The original recipe is not gluten-free because it uses graham cracker crumbs. However, you can easily make them gluten-free by using gluten-free graham cracker crumbs or other gluten-free alternatives.
Can I make these without nuts?
Absolutely! If you have nut allergies or just prefer not to use nuts, you can omit them or substitute with seeds like sunflower or pumpkin for added texture.
How long do these No-Bake Chocolate Delights last?
When stored in an airtight container in the refrigerator, they will last for about 5-7 days. You can also freeze them for up to 2 months.
Can I use coconut oil instead of butter?
Yes, coconut oil is a great dairy-free alternative to butter. Just make sure to use the same amount (1 cup) and melt it before adding to the mixture.
What can I use instead of shredded coconut?
If you don’t like shredded coconut, you can use oatmeal or omit it altogether. Both options will give the treats a similar texture and consistency.
Can I add other mix-ins besides nuts and coconut?
Definitely! Feel free to get creative with your mix-ins. Dried fruits, chocolate chips, toffee bits, and even a bit of sea salt can add a unique and delicious twist to your No-Bake Chocolate Delights.
Are these treats suitable for a vegan diet?
With a few tweaks, yes! Use coconut oil instead of butter, and replace the powdered sugar with a vegan alternative. You can also use vegan chocolate chips and any other vegan-friendly ingredients you prefer.
Can I make these ahead of time for a party?
Absolutely! These No-Bake Chocolate Delights are perfect for making ahead of time. Just store them in the refrigerator or freezer until you’re ready to serve. They’ll keep well and are a crowd-pleaser at any party.
Do I need to chill the balls before serving?
Yes, chilling is an important step. It helps the balls set and hold their shape. Without chilling, they may be too soft and messy to handle. Chilling for at least an hour is recommended.
These No-Bake Chocolate Delights are a testament to the joy of simple, delicious treats that bring people together. Whether you’re making them for a special occasion or just a sweet moment with your family, they’re sure to be a hit. And if you’re looking for more delightful recipes, be sure to explore our all delicious recipes category for more inspiration. Happy cooking!
No-Bake Chocolate Delights
Ingredients
Equipment
Method
- Mix the graham cracker crumbs, melted butter, powdered sugar, and cocoa powder in a large bowl until smooth and slightly sticky.
- Stir in the vanilla extract, shredded coconut, and chopped nuts until well combined.
- Using a small cookie scoop or a tablespoon, form the mixture into small balls and place them on a baking sheet lined with parchment paper.
- Chill the balls in the refrigerator for at least one hour until firm.