
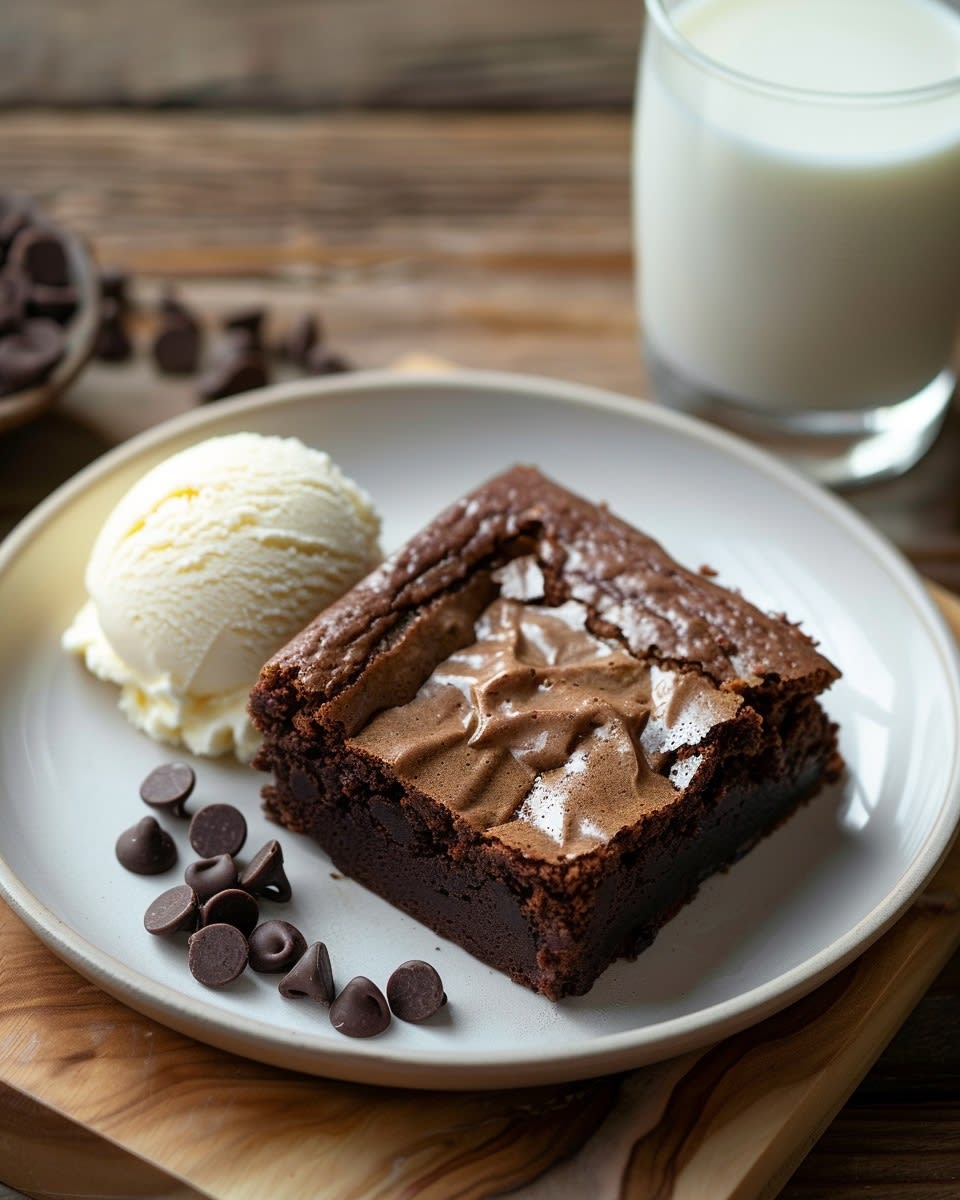
Why This Quick Chocolate Brownies Recipe Is a Must-Have in Your Baking Arsenal
Imagine this: you’re suddenly craving something sweet and chocolatey, but you don’t want to spend hours in the kitchen. Enter the Quick Chocolate Brownies, my go-to recipe when I need a treat that’s both delicious and easy to whip up. These brownies are so good, they’ve become a staple in my home, and trust me, once you try them, they’ll be a regular in your baking rotation too!
A Brief History of Quick Chocolate Brownies
Brownies have a rich history, dating back to the early 1900s. They were first created in the United States and quickly gained popularity for their dense, fudgy texture and rich, chocolate flavor. Over the years, brownie recipes have evolved, with various variations and twists, but the quick and easy version remains a favorite among busy bakers like us. Whether you’re making them for a family gathering or a quick dessert, these brownies never disappoint.
Why You’ll Love This Quick Chocolate Brownies Recipe
There’s a lot to love about this recipe. First, it’s incredibly simple, requiring just a few basic ingredients and minimal effort. Second, the flavors are out of this world—rich, chocolaty, and perfectly balanced. And third, they’re versatile. You can keep them classic or add your own special touches, like nuts or chocolate chips. It’s a win-win for both your taste buds and your time.
Perfect Occasions to Prepare This Quick Chocolate Brownies Recipe
These brownies are perfect for any occasion. Bake them for a last-minute potluck, a cozy night in with friends, or as a sweet treat for the family. They also make a fantastic addition to holiday gatherings, birthday parties, or even as a comforting gift. The possibilities are endless, and the smiles they bring are priceless.
Ingredients for Quick Chocolate Brownies
- 1 cup all-purpose flour
- 1 cup granulated sugar
- ¾ cup cocoa powder
- ½ cup unsalted butter, melted
- 4 large eggs
- 1 teaspoon vanilla extract
- ¼ teaspoon salt
- Optional: ½ cup chopped walnuts or chocolate chips
Substitution Options
If you’re missing an ingredient, don’t worry! Here are some swaps:
- Flour: Use gluten-free flour for a gluten-free version.
- Cocoa Powder: Substitute with dark cocoa powder for a deeper flavor.
- Eggs: Use ¼ cup unsweetened applesauce per egg for an egg-free option.
- Butter: Replace with coconut oil for a dairy-free alternative.
Preparation: Step-by-Step Guide
Step 1: Preheat the Oven
Start by preheating your oven to 350°F (175°C). While the oven is heating up, take a moment to gather all your ingredients. This will make the process smoother and more enjoyable.
Step 2: Mix Dry Ingredients
In a large mixing bowl, whisk together the all-purpose flour, granulated sugar, cocoa powder, and salt. The rich, deep color of the cocoa powder will make your kitchen smell heavenly already.
Step 3: Add Wet Ingredients
To the dry mixture, add the melted butter, eggs, and vanilla extract. Stir until everything is well combined. The batter will be thick and glossy, a sign that you’re on the right track. If you’re using walnuts or chocolate chips, now is the time to fold them in gently.
Step 4: Pour into Baking Pan
Pour the batter into a greased 8×8-inch baking pan. Use a spatula to spread it evenly. The smooth, velvety texture of the batter is a delight to work with and promises a delicious result.
Step 5: Bake to Perfection
Bake in the preheated oven for about 25-30 minutes, or until a toothpick inserted into the center comes out clean. The aroma of chocolate will fill your kitchen, making it hard to wait for them to cool!
Step 6: Cool and Enjoy
Let the brownies cool in the pan for about 10-15 minutes before slicing. This allows them to set and makes them easier to cut. Once cooled, serve and enjoy the gooey, chocolatey goodness.
Timing
Prep Time: 10 minutes
Cooking Time: 25-30 minutes
Total Time: 45 minutes
Resting Time: 10-15 minutes
Chef’s Secret
For an extra-rich flavor, use a combination of dark and milk chocolate in the form of chocolate chips. This small tweak takes the brownies from good to great, adding a depth of flavor that’s hard to resist.
Extra Info
Did you know that cocoa powder is not just delicious but also packed with antioxidants? It’s a little-known fact that makes indulging in these brownies even more satisfying. Plus, the natural compounds in cocoa can boost your mood, making these treats a little dose of happiness.
Necessary Equipment
- 8×8-inch baking pan
- Mixing bowls
- Whisk or electric mixer
- Spatula
- Toothpick
- Oven gloves
Storage
Storing these brownies is easy. Once they’ve cooled completely, you can keep them in an airtight container at room temperature for up to 5 days. This way, they stay fresh and moist, ready to be enjoyed anytime.
If you want to extend their shelf life, you can store them in the refrigerator, where they’ll last up to a week. Just make sure to let them come to room temperature before serving to get the best texture and flavor.
For long-term storage, wrap the brownies tightly in plastic wrap and then in foil. Place them in a freezer-safe bag and freeze for up to 3 months. When you’re ready to enjoy, simply thaw them at room temperature.
Tips and Advice
To enhance the flavor, try adding a pinch of espresso powder to the batter. It enhances the chocolate flavor without making the brownies taste like coffee. Also, if you prefer a fudgier texture, slightly underbake the brownies and let them cool completely before cutting.
Presentation Tips
These brownies look and taste amazing when served with a scoop of vanilla ice cream or a dollop of whipped cream. For a more elegant presentation, dust them with a light layer of powdered sugar. You can also add a drizzle of caramel or chocolate sauce for an extra touch of decadence.
Healthier Alternative Recipes
Here are six possible variations of this recipe, each with its own unique twist:
- Zucchini Brownies: Grate zucchini and mix it into the batter for added moisture and a hidden vegetable kick.
- Avocado Brownies: Use mashed avocado instead of butter for a healthier, creamy texture.
- Black Bean Brownies: Puree black beans and incorporate them into the batter for a protein-packed treat.
- Kale Brownies: Blend kale into the batter for a nutrient-rich, green twist.
- Beetroot Brownies: Puree cooked beets and add them to the batter for a vibrant, earthy flavor.
- Quinoa Brownies: Cook and puree quinoa, then mix it into the batter for a gluten-free, protein-rich option.
For a delightful no-bake option, check out our No-Bake Chocolate Delights. They’re a perfect treat for those who want a quick, mess-free dessert.
Common Mistakes to Avoid
Mistake 1: Overmixing the Batter
Overmixing the batter can lead to tough, dry brownies. Be gentle and mix just until the ingredients are combined. This ensures a tender, moist texture.
Mistake 2: Not Using Room Temperature Ingredients
Using cold ingredients, especially butter and eggs, can affect the consistency of the batter. Make sure all your ingredients are at room temperature for the best results.
Mistake 3: Overbaking the Brownies
Overbaking is a common mistake that can turn your brownies from gooey and fudgy to dry and crumbly. Keep an eye on them and remove from the oven when a toothpick inserted in the center comes out with a few moist crumbs.
Mistake 4: Not Cooling the Brownies Before Cutting
It’s tempting to dive right in, but cooling the brownies for at least 20-30 minutes is crucial. This allows them to set properly and makes them easier to cut and serve.
Mistake 5: Using Low-Quality Cocoa Powder
The quality of your cocoa powder can make a big difference in the taste of your brownies. Opt for high-quality, Dutch-processed cocoa powder for a richer, more intense flavor.
Understanding the cooking process and how to handle ingredients correctly can help you avoid these common pitfalls and achieve the perfect batch of brownies every time.
Now that you have all the tips and tricks, why not explore more delectable and easy recipes in our dessert section? From Honey Yogurt Delight to Peanut Butter Bliss, there’s a world of sweet treats waiting for you.
FAQ
Can I use margarine instead of butter?
Yes, you can use margarine as a substitute for butter, but keep in mind that it might change the texture and flavor slightly. For the best results, use a high-quality margarine with a high fat content.
How do I make the brownies fudgier?
To make the brownies fudgier, you can slightly underbake them. Remove them from the oven when a toothpick inserted in the center comes out with a few moist crumbs. This will give you a gooey, fudgy center.
Can I use almond flour instead of all-purpose flour?
Yes, you can use almond flour, but the texture will be different. Almond flour makes the brownies denser and more moist. Start by substituting half of the all-purpose flour with almond flour and adjust according to your preference.
Is it okay to use salted butter?
While you can use salted butter, it’s best to use unsalted butter and add salt separately. This way, you can control the amount of salt in the recipe. If you only have salted butter, omit the additional salt.
How do I know when the brownies are done?
Insert a toothpick into the center of the brownies. If it comes out with a few moist crumbs, they’re done. If it comes out wet, bake for a few more minutes. If it comes out clean, they may be overbaked.
Can I add other flavors to the brownies?
Absolutely! Feel free to add other flavors like a pinch of cinnamon, a splash of orange zest, or a handful of your favorite nuts. Just be mindful of the quantities to avoid overpowering the chocolate flavor.
What if I don’t have cocoa powder?
If you don’t have cocoa powder, you can use melted unsweetened baking chocolate. Melt about 3 ounces of unsweetened baking chocolate and stir it into the batter. This will give you a rich, chocolatey flavor.
Can I use brown sugar instead of white sugar?
Yes, you can use brown sugar, which will add a slight molasses flavor and a bit more moisture. However, the brownies may be slightly denser and have a different texture. Start with a 1:1 ratio and adjust to your taste.
How do I store leftover brownies?
Store leftover brownies in an airtight container at room temperature for up to 5 days. For longer storage, place them in the refrigerator for up to a week or freeze them for up to 3 months. Thaw at room temperature before serving.
Can I make these brownies in advance?
Absolutely! You can make the brownies a day or two in advance. Store them in an airtight container at room temperature. They’ll stay fresh and delicious, ready to be enjoyed whenever you’re ready.
Final Thoughts
Whether you’re a seasoned baker or a kitchen novice, this Quick Chocolate Brownies recipe is a must-try. It’s simple, delicious, and perfect for any occasion. So, grab your apron, preheat that oven, and get ready to indulge in a treat that’s sure to become a family favorite. Happy baking!
Quick Chocolate Brownies
Ingredients
Equipment
Method
- Preheat your oven to 350°F (175°C).
- In a large mixing bowl, whisk together the all-purpose flour, granulated sugar, cocoa powder, and salt.
- Add the melted butter, eggs, and vanilla extract to the dry mixture and stir until well combined.
- Pour the batter into a greased 8x8-inch baking pan and spread it evenly.
- Bake in the preheated oven for about 25-30 minutes, or until a toothpick inserted into the center comes out clean.
- Let the brownies cool in the pan for about 10-15 minutes before slicing and serving.