
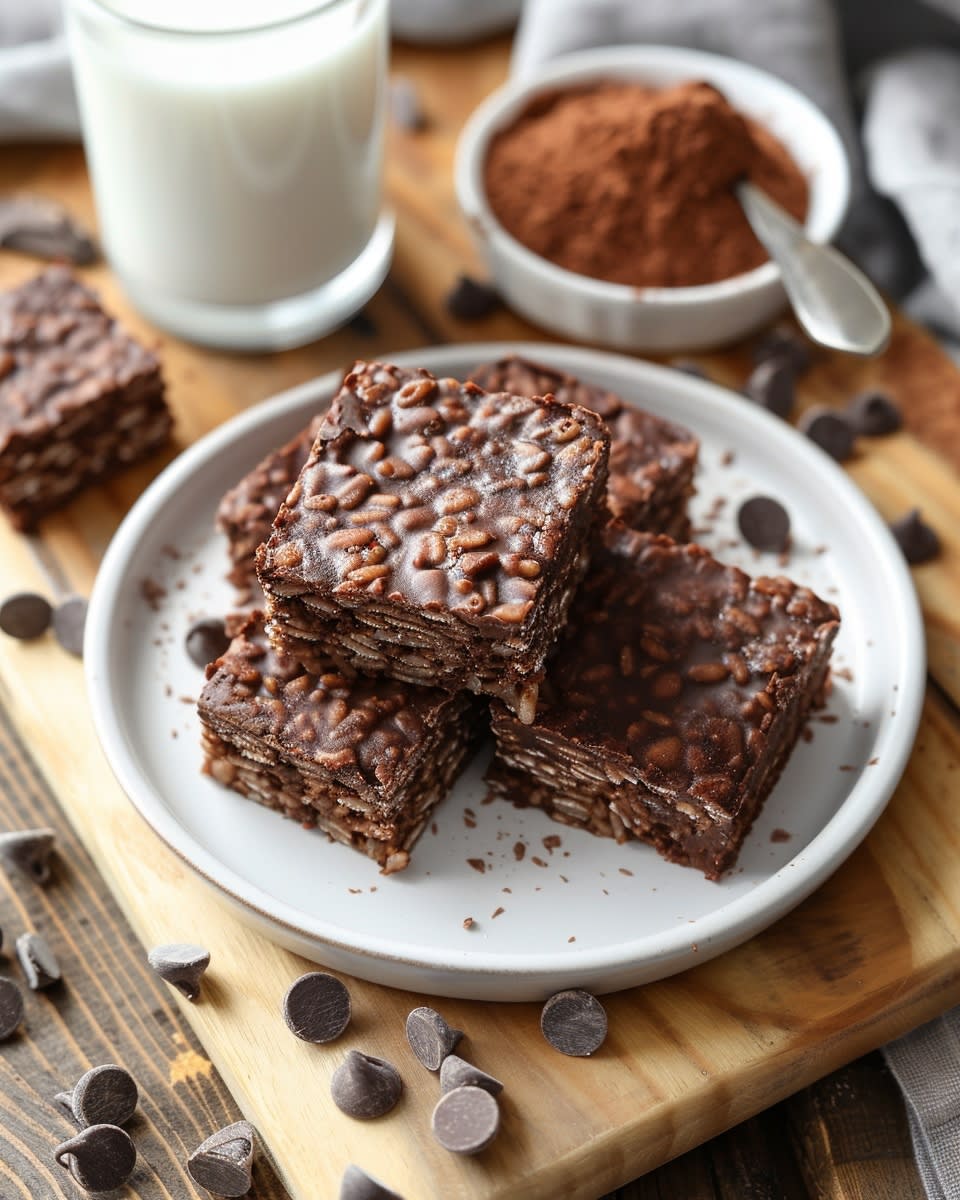
A Sweet Treat Without the Heat: No-Bake Chocolate Rice Bars
I stumbled upon this delightful recipe for No-Bake Chocolate Rice Bars during a sweltering summer day, and it’s been a hit with my family ever since. Imagine a gooey, chocolatey, and satisfying treat that requires no baking—perfect for those moments when you crave something sweet but don’t want to turn on the oven.
The Story Behind No-Bake Chocolate Bars
No-Bake Chocolate Rice Bars have a rich history, dating back to the 1950s when home cooks were looking for inventive ways to delight their families without the hassle of baking. This recipe is a modern twist on a classic, combining the timeless love for chocolate and the convenience of no-bake desserts. I’ve tested this recipe at numerous family gatherings, and it never fails to bring smiles and requests for more.
Why You’ll Love This Recipe
This recipe is a real charmer because it’s so simple and versatile. The combination of creamy chocolate, crunchy rice, and a hint of marshmallow makes for a delightful texture and flavor. Plus, it’s a breeze to make, even for beginners. Perfect for those last-minute treats or whenever you need a quick, satisfying dessert.
Ideal Occasions for No-Bake Chocolate Bars
These bars are perfect for any occasion where you want a quick and easy dessert. They’re a hit at kids’ parties, family picnics, and even as a sweet treat for your next potluck. Just whip them up, cut them into bite-sized pieces, and watch them disappear.
Ingredients You’ll Need
- 1 cup butter (unsalted)
- 1 bag (10-oz) mini marshmallows
- 1 cup semi-sweet chocolate chips
- 3 cups crispy rice cereal
- 1 teaspoon vanilla extract
- Sprinkles or shredded coconut (optional, for topping)
Substitution Options
If you’re looking to mix things up or have some dietary restrictions, here are some great substitutes:
- Butter: Substitute with coconut oil for a dairy-free option.
- Chocolate Chips: Use dark chocolate or white chocolate for a different flavor profile.
- Rice Cereal: Try using puffed quinoa or another type of puffed grain for a nutritious twist.
Step-by-Step Preparation
Step 1: Melt the Butter and Marshmallows
In a large, microwave-safe bowl, combine the butter and marshmallows. Microwave in 30-second intervals, stirring between each, until the mixture is smooth and fully melted. The aroma of melting butter and marshmallows will make your kitchen smell heavenly.
Step 2: Add the Chocolate Chips
Stir in the chocolate chips until they are melted and well combined. The chocolate should blend seamlessly with the butter and marshmallow mixture, creating a rich, velvety base.
Step 3: Mix in the Rice Cereal
Add the crispy rice cereal to the bowl and stir gently until the cereal is evenly coated with the chocolate mixture. The crunch of the cereal adds a wonderful texture to the bars.
Step 4: Add Vanilla and Mix
Stir in the vanilla extract for a touch of extra flavor. The vanilla complements the chocolate and adds a subtle, comforting note.
Step 5: Transfer to a Tray
Pour the mixture into a 9×13 inch pan lined with parchment paper. Use a spatula to smooth the top and press the mixture down firmly. If you like, sprinkle some sprinkles or shredded coconut on top for added color and texture.
Step 6: Chill and Cut
Place the pan in the refrigerator and let it chill for at least 2 hours, or until the bars are firm. Once set, use a sharp knife to cut the bars into squares. The cold, solid bars are a joy to cut, and the clean lines make for a professional-looking treat.
Chef’s Tip: Add a Secret Ingredient
For an extra special touch, add a tablespoon of espresso powder to the melted chocolate mixture. This enhances the chocolate flavor and adds a subtle, sophisticated note.
Timing and Resting
- Prep Time: 10 minutes
- Chilling Time: 2 hours
- Total Time: 2 hours 10 minutes
Chef’s Secret
To make these bars extra indulgent, drizzle some melted white chocolate over the top after pressing the mixture into the pan. Let it set before cutting. This adds a beautiful, decorative touch and a delicious contrast to the dark chocolate.
Extra Info
Did you know that marshmallows get their fluffy texture from air being whipped into a mixture of sugar, water, and gelatin? This fun fact always amazes me and adds to the magic of this recipe.
Necessary Equipment
- Large microwave-safe bowl
- 9×13 inch pan
- Parchment paper
- Spatula
- Sharp knife
Storage Tips
Store your No-Bake Chocolate Rice Bars in an airtight container in the refrigerator. They will last for up to one week. For best results, keep them in a single layer to avoid sticking together. If you want to freeze them, wrap them individually in plastic wrap and place them in a freezer bag. When you’re ready to enjoy, just let them thaw in the fridge for a few hours. These bars are also great for gifting, just make sure to store them in a cool, dry place during transport to prevent melting.
Tips and Advice
– Use a non-stick pan or line your pan with parchment paper for easy removal.
– Make sure all ingredients are at room temperature before starting.
– Don’t be afraid to experiment with different toppings, such as crushed nuts or dried fruit, for a unique twist.
Presentation Tips
– Cut the bars into small, bite-sized squares for a party or potluck.
– Arrange them on a platter with a mix of other no-bake treats, like No-Bake Peanut Squares and Coconut Chocolate Delights, for a colorful and varied display.
– Drizzle with melted white and dark chocolate for a visually appealing finish.
Healthier Alternative Recipes
If you’re looking for some healthier alternatives, here are six variations to try:
1. **No-Bake Almond Joy Bars**: Swap out the rice cereal for almond slivers and add a layer of coconut flakes. A perfect treat for nut lovers.
2. **No-Bake Fruit Delight**: Incorporate dried fruits like cranberries and apricots for a burst of natural sweetness and a chewy texture.
3. **No-Bake Cheesecake Cups**: Combine the rice cereal with a cream cheese mixture and top with fresh berries for a light and creamy dessert.
4. **No-Bake Oatmeal Bars**: Use rolled oats instead of rice cereal for a hearty, wholesome treat. Add honey and a touch of cinnamon for extra flavor.
5. **No-Bake Peanut Butter Bars**: Melt peanut butter along with the chocolate for a rich, nutty flavor. Top with a sprinkle of sea salt for a salty-sweet combo.
6. **No-Bake Trail Mix Bars**: Mix in a variety of nuts, seeds, and dried fruits for a nutritious and energy-boosting snack.
Common Mistakes to Avoid
Mistake 1: Over-Melting the Marshmallows
If you over-melt the marshmallows, they can become too sticky and hard to work with. To avoid this, heat them in short intervals and stir frequently. This ensures a smooth, creamy texture.
Mistake 2: Not Pressing the Mixture Firmly
If you don’t press the mixture firmly into the pan, the bars will fall apart when you cut them. Use the back of a spatula or a piece of parchment paper to press the mixture down firmly and evenly.
Mistake 3: Using Too Much Cereal
Adding too much cereal can make the bars dry and crumbly. Stick to the recommended amount and measure carefully to achieve the perfect balance of chocolate and crunch.
Mistake 4: Not Chilling Long Enough
Not chilling the bars long enough can result in a soft, messy texture. Make sure to chill them for at least 2 hours, or until they are firm and easy to cut. Patience is key!
Mistake 5: Using Old or Stale Ingredients
Using old or stale ingredients can affect the taste and texture of your bars. Always check the expiration dates and use fresh, high-quality ingredients. For more tips on food quality, visit the FDA’s guide on food spoilage.
FAQ
Can I use margarine instead of butter?
Yes, you can use margarine, but it might affect the flavor slightly. Unsalted butter is preferred for its rich, creamy taste, but if you need a dairy-free option, coconut oil works well.
What if I don’t have mini marshmallows?
You can use regular marshmallows, but they take longer to melt and may require more stirring. Cut the regular marshmallows into smaller pieces to help them melt faster.
Can I use dark chocolate instead of semi-sweet?
Absolutely! Dark chocolate will give the bars a richer, more intense flavor. If you prefer a sweeter treat, stick with semi-sweet or milk chocolate.
How do I cut the bars neatly?
To cut the bars neatly, use a sharp knife and wipe it clean with a damp cloth between cuts. This prevents the chocolate from sticking and ensures clean, straight edges.
Can I add nuts to the bars?
Yes, adding nuts like almonds or walnuts can give the bars a nice crunch and extra flavor. Simply fold them into the mixture before pressing it into the pan.
Are these bars suitable for people with gluten allergies?
Yes, crispy rice cereal is typically gluten-free, making these bars a great option for those with gluten sensitivities. Always check the labels of your ingredients to ensure they are certified gluten-free.
Can I make these bars ahead of time?
Definitely! You can make these bars a day or two in advance and store them in the refrigerator. Just make sure to keep them in an airtight container to maintain freshness.
What’s the best way to store leftover bars?
Store the bars in an airtight container in the refrigerator for up to one week. For longer storage, wrap them individually in plastic wrap and place them in a freezer bag. They can be frozen for up to a month.
Can I use different types of cereal?
Yes, you can use different types of puffed cereals, such as puffed quinoa or puffed millet, for a unique twist. Just make sure the cereal is crisp and not stale.
How do I make the bars less sweet?
To make the bars less sweet, reduce the amount of marshmallows and add a pinch of salt to the mixture. You can also use dark chocolate, which has a less sweet and more intense flavor.
Feel free to explore more delicious no-bake recipes in our collection. Happy cooking, and enjoy your delectable No-Bake Chocolate Rice Bars!
No-Bake Chocolate Bars
Ingredients
Equipment
Method
- In a large, microwave-safe bowl, combine the butter and marshmallows. Microwave in 30-second intervals, stirring between each, until smooth.
- Stir in the chocolate chips until melted and well combined.
- Add the crispy rice cereal and stir gently until evenly coated.
- Stir in the vanilla extract.
- Pour the mixture into a 9x13 inch pan lined with parchment paper and smooth the top.
- Chill in the refrigerator for at least 2 hours, then cut into squares.