
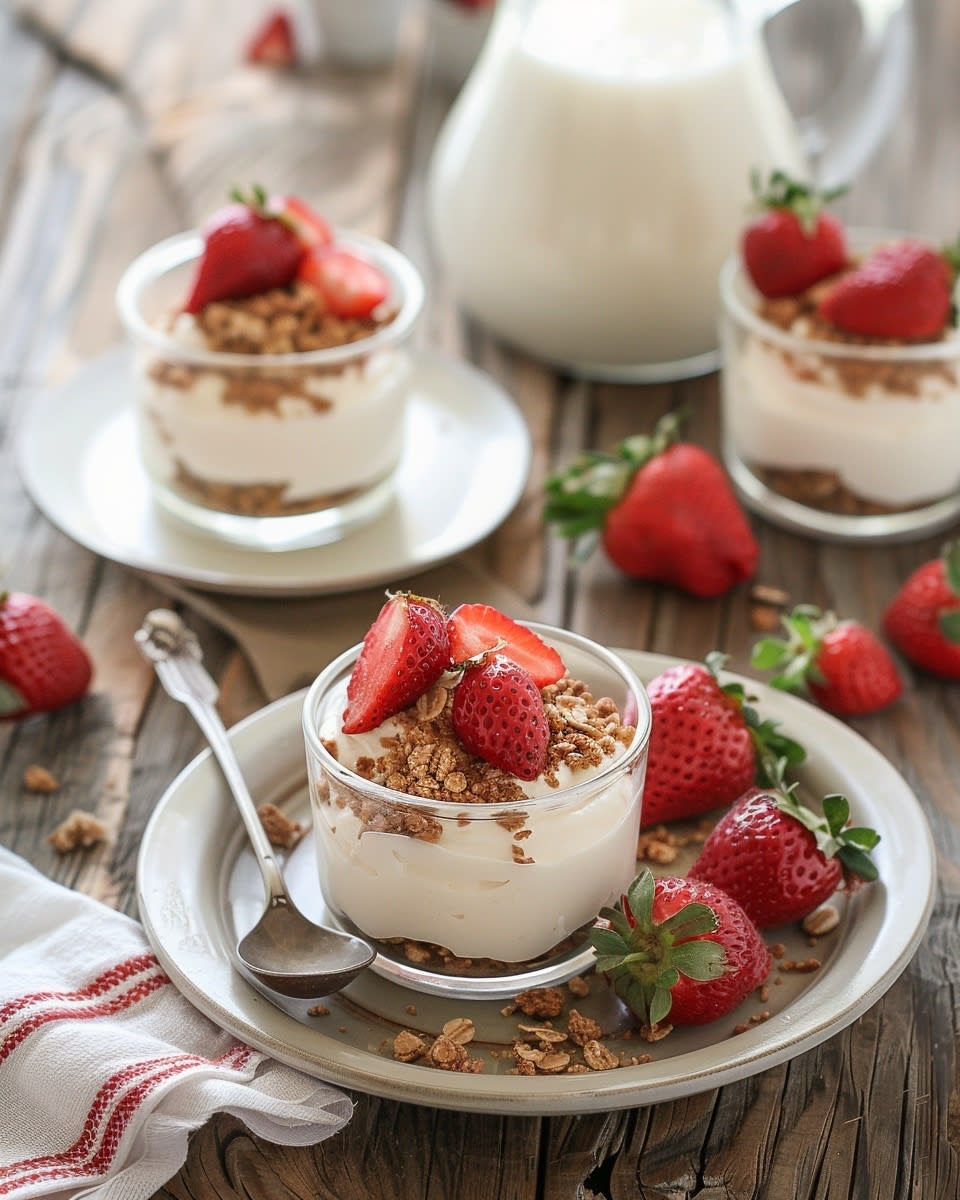
Hey there, fellow dessert lovers! I recently stumbled upon a recipe that’s not only super easy to whip up but also an absolute crowd-pleaser. Imagine fresh, juicy strawberries, creamy vanilla pudding, and a crunchy graham cracker crust all combined in a delightful no-bake treat. Yes, I’m talking about the No-Bake Strawberry Dessert Cups. This sweet treat is perfect for those days when you want something delicious without turning on the oven. Let’s dive into what makes this recipe so special.
A Little History of No-Bake Strawberry Dessert Cups
Growing up, my grandmother used to make a similar dessert, but with a twist. She would layer it in a large dish and serve it family-style. The modern version, however, is all about individual servings, making it perfect for parties or just a little treat for yourself. It’s a testament to how recipes evolve over time, keeping the best parts and adding new, exciting elements.
Why You’ll Love This No-Bake Delight
The best part about these No-Bake Strawberry Dessert Cups is their simplicity. You don’t need any fancy equipment or baking skills. Plus, the flavors are just divine. The combination of sweet, tangy strawberries and rich, creamy pudding is a match made in heaven. And let’s not forget the graham cracker crust—it adds a perfect crunch that balances out the soft, luscious layers.
Celebrate with These Sweet Treats
These cups are perfect for any occasion. Whether you’re hosting a summer barbecue, a birthday party, or just having a cozy night in, No-Bake Strawberry Dessert Cups are sure to be a hit. They’re also a great way to use up any extra strawberries you might have lying around.
Ingredients for No-Bake Strawberry Dessert Cups
- 1 cup graham cracker crumbs
- 1/2 cup unsalted butter, melted
- 1/4 cup granulated sugar
- 2 cups fresh strawberries, hulled and sliced
- 1 (3.4 oz) package instant vanilla pudding mix
- 2 cups milk
- 1 cup heavy cream
- 1/4 cup powdered sugar
- 1 teaspoon vanilla extract
Substitution Options
- Graham cracker crumbs: Use crushed cookies like Oreos or Nilla Wafers.
- Fresh strawberries: Substitute with other berries like blueberries or raspberries.
- Vanilla pudding mix: Try using white chocolate or cheesecake pudding mix for a different flavor.
Preparation: Step-by-Step Guide
Step 1: Prepare the Graham Cracker Crust
In a medium bowl, mix together the graham cracker crumbs, melted butter, and granulated sugar. Stir until well combined. The mixture should resemble wet sand. Divide the mixture evenly among 6 small cups or ramekins. Press the crumbs firmly into the bottom of each cup to form a compact crust. Set aside.
Step 2: Whip Up the Vanilla Pudding
In a separate bowl, whisk together the vanilla pudding mix and milk according to the package instructions. Once the pudding starts to thicken, set it aside to cool slightly. This step is crucial as it helps the pudding set properly and prevents it from being too runny.
Step 3: Prepare the Whipped Cream
In another bowl, combine the heavy cream, powdered sugar, and vanilla extract. Beat with an electric mixer on high speed until stiff peaks form. The whipped cream should be light and fluffy, with a smooth, velvety texture. It’s the perfect complement to the creamy pudding and tangy strawberries.
Step 4: Assemble the Dessert Cups
Spoon a layer of the vanilla pudding on top of the graham cracker crust in each cup. Smooth it out with the back of the spoon. Add a generous layer of sliced strawberries over the pudding, then top with a dollop of whipped cream. Repeat the layers if you have more room. The vibrant colors and textures really make these cups stand out.
Step 5: Chill and Serve
Place the assembled cups in the refrigerator to chill for at least 2 hours, or until the pudding and whipped cream are set. This chilling time allows the flavors to meld together beautifully. When ready to serve, garnish with a few extra strawberry slices and a sprinkle of graham cracker crumbs for an extra touch.
Timing
Prep Time: 20 minutes
Cook Time: 0 minutes (no baking required)
Chill Time: 2 hours
Total Time: 2 hours 20 minutes
Chef’s Secret
One of my favorite tricks is to add a splash of lemon juice to the sliced strawberries before assembling the cups. This not only enhances the flavor but also helps to keep the strawberries looking bright and fresh.
Extra Info
Did you know that strawberries are one of the only fruits where the seeds are on the outside? Each strawberry has about 200 tiny seeds, which give them their unique, dotted appearance. It’s a fun fact to share while enjoying your No-Bake Strawberry Dessert Cups!
Necessary Equipment
- Mixing bowls
- Electric mixer
- Measuring cups and spoons
- Ramekins or small cups
- Spatula
Storage
To store your No-Bake Strawberry Dessert Cups, cover them tightly with plastic wrap and place them in the refrigerator. They will stay fresh for up to 3 days. If you notice any excess moisture, gently pat the surface dry before serving. For a longer shelf life, you can also freeze the cups, but they are best enjoyed fresh.
Tips and Advice
- Use fresh, ripe strawberries for the best flavor.
- Make sure the pudding is completely cooled before assembling to prevent it from melting the whipped cream.
- For a more indulgent treat, you can add a layer of chocolate ganache between the pudding and the strawberries.
Presentation Tips
- Garnish with a mint leaf for a pop of color.
- Use a piping bag to add a decorative swirl of whipped cream on top.
- Drizzle a bit of strawberry sauce over the top for added sweetness.
Healthier Alternative Recipes
Here are some variations to try if you’re looking for a healthier option:
- No-Bake Berry Bliss Cups: Swap the graham cracker crust for a nut-based crust and use a sugar-free pudding mix.
- Coconut Strawberry Delights: Replace the graham cracker crumbs with shredded coconut and use coconut cream instead of heavy cream.
- Strawberry Chia Pudding Cups: Use chia pudding as the base and layer with fresh strawberries and a dollop of Greek yogurt.
- Protein-Packed Dessert Cups: Add a scoop of protein powder to the pudding mix and use almond milk instead of regular milk.
- Vegan No-Bake Dessert Cups: Use vegan pudding mix, coconut cream, and a vegan-friendly crust.
- Low-Sugar Dessert Cups: Use a sugar substitute in the pudding and a sugar-free whipped topping.
If you’re a fan of no-bake desserts, you might also enjoy our No-Bake Chocolate Bars or No-Bake Peanut Squares. Both are equally easy and delicious. And if you’re looking for more fruit-based treats, check out our No Bake Fruit Delight and Coconut Chocolate Delights.
Common Mistakes to Avoid
Mistake 1: Overmixing the Graham Cracker Crust
When mixing the graham cracker crumbs with butter and sugar, avoid overmixing. This can lead to a tough, overly dense crust. Mix until the ingredients are just combined and the mixture resembles wet sand. A light touch here will give you a perfectly crumbly and crunchy base.
Mistake 2: Not Letting the Pudding Cool Enough
Adding warm pudding to the cups can cause the whipped cream to melt and the layers to become messy. Make sure the pudding is at room temperature before assembling. This will help the layers set properly and give you a clean, professional look.
Mistake 3: Using Too Much Whipped Cream
While whipped cream is delicious, too much can overpower the other flavors. Use a light hand and add just enough to complement the pudding and strawberries. You can always add more if needed, but it’s hard to take it away once it’s in the cups.
Mistake 4: Not Chilling Long Enough
Chilling the dessert for at least 2 hours is essential. This allows the pudding to set and the flavors to meld. If you’re short on time, you can freeze the cups for about 30 minutes, but the texture will be slightly different. For the best results, be patient and let the dessert chill thoroughly.
Mistake 5: Slicing Strawberries Too Early
Slice the strawberries right before you’re ready to assemble the cups. Slicing them too early can make them release water, which can make the dessert soggy. Waiting until the last minute ensures your strawberries are fresh and vibrant.
When handling and storing your ingredients, always follow food handling guidelines to ensure the quality and safety of your dish.
Now that you’ve mastered the art of No-Bake Strawberry Dessert Cups, why not explore more no-bake delights in our No-Bake Desserts category? There’s a whole world of easy and delicious treats waiting for you.
FAQ
Can I use frozen strawberries for this recipe?
Yes, you can use frozen strawberries, but they may release more water as they thaw. This can make the dessert a bit soggy. To avoid this, thaw the strawberries and pat them dry before using. This will help maintain the right texture and consistency.
How long can I store the No-Bake Strawberry Dessert Cups?
You can store the dessert cups in the refrigerator for up to 3 days. Cover them with plastic wrap to keep them fresh. If you notice any excess moisture, gently pat the surface dry before serving. For longer storage, you can freeze the cups, but the texture will change slightly.
Can I use a different type of pudding?
Absolutely! You can experiment with different flavors of pudding. White chocolate, cheesecake, or even banana pudding can work well. Just make sure to follow the same steps and adjust the liquid as needed. The key is to balance the flavors with the strawberries and whipped cream.
What can I use if I don’t have graham crackers?
If you don’t have graham crackers, you can use crushed cookies like Oreos or Nilla Wafers. You can also use a nut-based crust for a healthier option. Just make sure the crumbs are finely ground and mix well with the melted butter for a firm crust.
Can I make this recipe vegan?
Yes, you can make this recipe vegan by using a vegan pudding mix, coconut cream, and a vegan-friendly crust. You can also use a plant-based milk like almond or soy milk instead of regular milk. Just make sure to check the labels to ensure all ingredients are vegan.
How do I make the whipped cream stiffer?
To make the whipped cream stiffer, make sure the heavy cream is very cold. You can also chill the bowl and beaters in the freezer for a few minutes before whipping. Adding a bit of cream of tartar (about 1/8 teaspoon) can also help stabilize the whipped cream and make it firmer.
Can I use other fruits instead of strawberries?
Of course! You can use other berries like blueberries, raspberries, or blackberries. You can also try using peaches, cherries, or even a combination of different fruits. Just make sure to slice them thinly and layer them in the same way as the strawberries.
Is this recipe suitable for kids to help with?
Absolutely! This recipe is perfect for kids to help with. They can help mix the graham cracker crust, layer the pudding and strawberries, and even help whip the cream. It’s a fun activity and a great way to teach them basic cooking skills.
Can I make the pudding from scratch?
Yes, you can make the pudding from scratch. Just follow a simple vanilla pudding recipe and let it cool before layering. Homemade pudding can add a special touch to the dessert and allow you to control the sweetness and flavor.
Can I use sugar substitutes in this recipe?
Yes, you can use sugar substitutes like stevia or monk fruit sweetener. Just make sure to adjust the amount according to the product’s instructions, as they can be much sweeter than regular sugar. You can also use a sugar-free pudding mix for a lower-sugar option.
Thank you for joining me on this sweet journey. I hope you enjoy making and sharing these No-Bake Strawberry Dessert Cups with your loved ones. Happy cooking!
No-Bake Strawberry Cups
Ingredients
Equipment
Method
- In a medium bowl, mix together the graham cracker crumbs, melted butter, and granulated sugar until well combined.
- Divide the mixture evenly among 6 small cups or ramekins and press firmly to form a crust.
- In a separate bowl, whisk together the vanilla pudding mix and milk according to package instructions and let it cool slightly.
- In another bowl, combine the heavy cream, powdered sugar, and vanilla extract; beat until stiff peaks form.
- Spoon a layer of vanilla pudding over the graham cracker crust in each cup, followed by a layer of sliced strawberries and a dollop of whipped cream. Repeat layers if desired.
- Place the cups in the refrigerator to chill for at least 2 hours before serving.