
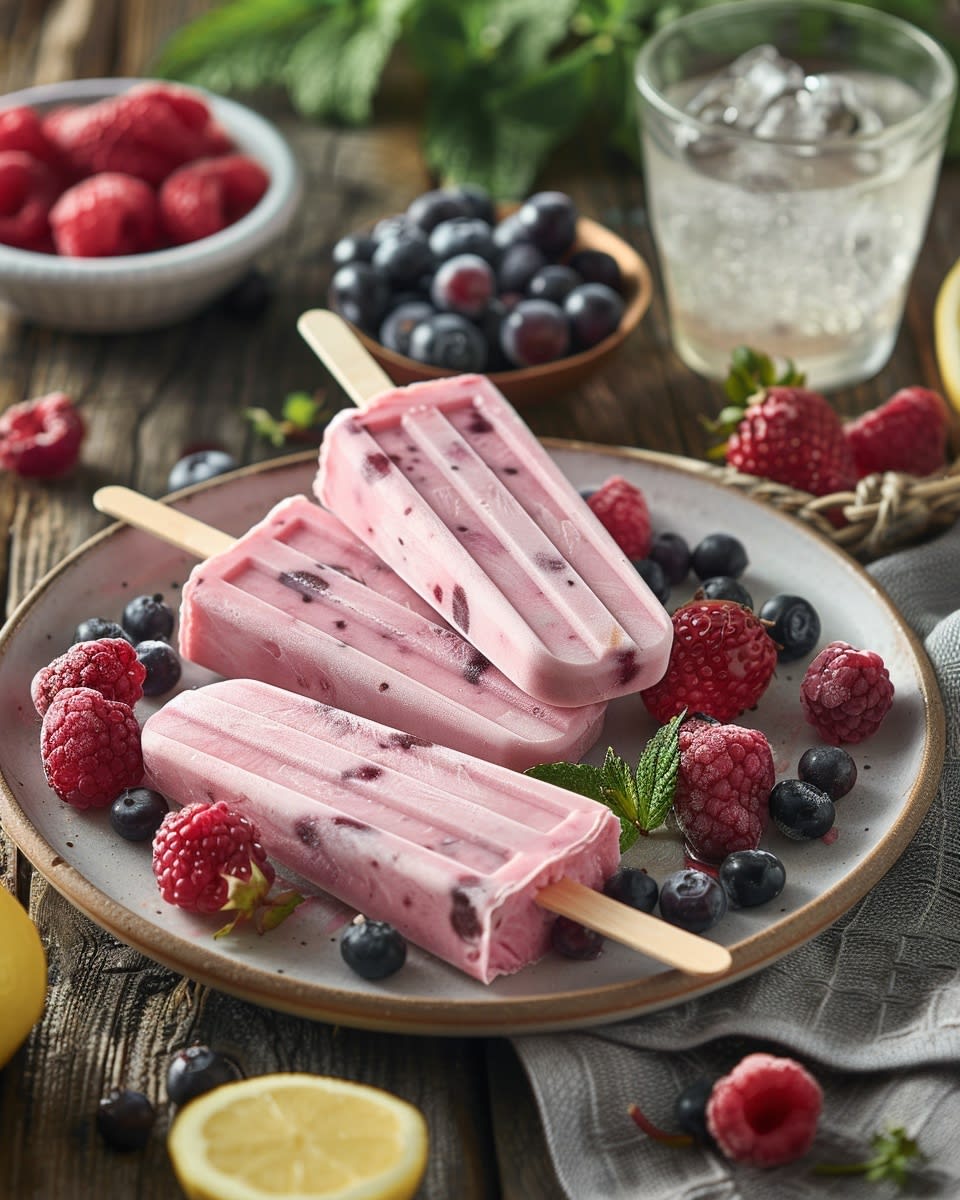
Refreshing Berry Yogurt Popsicles: A Sweet and Tangy Treat
Remember those hot summer days when you’d crave something cool and refreshing? Enter the delightful world of Berry Yogurt Popsicles. These pops are not just a treat; they’re a lifesaver on scorching afternoons. I first tried this recipe during a family reunion, and it was an instant hit. The combination of tangy yogurt and sweet, juicy berries is simply irresistible.
History and Background: A Chilled Tradition
These pops have a rich history, dating back to ancient civilizations who enjoyed frozen treats as a way to beat the heat. In modern times, Yogurt Berry Popsicles have become a staple in many households, especially during the summer. They’re a perfect blend of traditional flavors with a healthy twist.
Why You’ll Love This Recipe: A Burst of Flavor and Simplicity
What makes these Berry Yogurt Popsicles so special is their simplicity and versatility. The tanginess of the yogurt perfectly balances the sweetness of the berries, creating a treat that’s both refreshing and satisfying. Plus, they’re incredibly easy to make, even for beginners. The best part? You can customize them with your favorite fruits and flavors.
Perfect Occasions to Prepare This Recipe: A Crowd-Pleaser
These Yogurt Berry Popsicles are perfect for any summer gathering. Whether it’s a backyard barbecue, a pool party, or just a casual get-together, they’re sure to be a hit. They’re also great for kids’ parties, school events, or as a healthy snack for the whole family. I’ve even made them for my book club, and everyone raved about them!
Ingredients: Simple and Fresh
- 2 cups plain Greek yogurt
- 1/2 cup honey or maple syrup
- 1 teaspoon vanilla extract
- 1 cup mixed berries (strawberries, blueberries, raspberries)
Substitution Options: Get Creative
- Yogurt: Substitute with coconut yogurt for a dairy-free option.
- Sweetener: Use agave nectar or stevia instead of honey or maple syrup.
- Berries: Feel free to use any seasonal or frozen berries you like.
Preparation: Step-by-Step Guide
Step 1: Mix the Yogurt Base
In a large mixing bowl, combine the Greek yogurt, honey, and vanilla extract. Whisk until the mixture is smooth and creamy. The vanilla adds a subtle, aromatic note that complements the yogurt beautifully. Pro tip: For a creamier texture, use a hand mixer to blend the ingredients.
Step 2: Prepare the Berries
Rinse your choice of berries under cold water. Pat them dry with a paper towel. If using strawberries, remove the tops and cut them into small pieces. The colors and textures of the berries will add a vibrant, eye-catching appeal to your popsicles. Pro tip: For a more intense flavor, lightly mash some of the berries to release their juices.
Step 3: Assemble the Popsicles
Using a spoon, layer the yogurt mixture and berries into popsicle molds. Alternate between the yogurt and berries to create a marbled effect. This step is where you can get creative and make each popsicle unique. Pro tip: Tap the mold gently on the counter to remove any air bubbles and ensure the layers are even.
Step 4: Freeze and Enjoy
Insert the popsicle sticks into the molds and place them in the freezer. Allow the Berry Yogurt Popsicles to freeze for at least 4-6 hours, or overnight for the best results. Once frozen, run the molds under warm water for a few seconds to release the pops. Chef’s tip: Add a sprinkle of granola to the top before freezing for a crunchy texture.
Timing: How Long Does It Take?
Prep time: 10 minutes
Freezing time: 4-6 hours
Total time: 4 hours 10 minutes
Chef’s Secret: The Perfect Texture
To achieve the perfect texture, make sure the yogurt is at room temperature before mixing. This ensures a smoother consistency and prevents separation. Also, don’t overfill the molds—leave a little space at the top for easier unmolding.
Extra Info: A Sweet Surprise
Did you know that Yogurt Berry Popsicles are not just a tasty treat but also a nutritious one? Berries are packed with antioxidants and vitamins, while Greek yogurt is a good source of protein and probiotics. It’s a win-win for both your taste buds and your health.
Necessary Equipment: What You’ll Need
- Popsicle molds
- Mixing bowl
- Whisk or hand mixer
- Measuring cups and spoons
- Kitchen knife and cutting board (if using fresh strawberries)
Storage: Keeping Your Popsicles Fresh
Once your Berry Yogurt Popsicles are frozen, you can store them in the freezer for up to 2 months. To prevent freezer burn, wrap them individually in plastic wrap or aluminum foil. You can also store them in an airtight container, separating the layers with parchment paper. This way, you can enjoy them whenever you need a quick, refreshing treat.
Tips and Advice: Make Them Even Better
- Use a variety of berries for a mix of flavors and colors.
- Add a squeeze of lemon juice to the yogurt base for a zesty kick.
- For a more indulgent treat, swirl in a bit of chocolate sauce or caramel before freezing.
Presentation Tips: Make Them Look Stunning
- Layer the berries and yogurt in a decorative pattern.
- Garnish with a small piece of fresh fruit or a sprig of mint.
- Drizzle a little honey or maple syrup on top before serving.
Healthier Alternative Recipes: Variations to Try
- Protein-Packed Popsicles: Add a scoop of your favorite protein powder to the yogurt base. Perfect for post-workout snacks.
- Green Smoothie Popsicles: Blend spinach, banana, and a touch of honey with Greek yogurt for a nutrient-packed treat.
- Vegan Coconut Popsicles: Substitute Greek yogurt with coconut yogurt and add a splash of coconut milk for a creamy, dairy-free option.
- Spiced Apple Cider Popsicles: Mix apple cider with cinnamon and a touch of honey, then combine with yogurt for a fall-inspired treat.
- Avocado Lime Popsicles: Blend ripe avocado, lime juice, and a bit of honey with Greek yogurt for a smooth, creamy, and healthy dessert.
- Matcha Green Tea Popsicles: Stir in matcha powder and a dash of honey with Greek yogurt for an antioxidant-rich, refreshing treat.
If you’re looking for more innovative and delicious recipes, check out our Protein-Packed Brownies, Minty Fruit Delight, Creamy Avocado Mousse, and Banana Oatmeal Cookies.
Common Mistakes to Avoid: Get It Right the First Time
Mistake 1: Overfilling the Molds
Overfilling the molds can lead to messy overflow and difficulty in unmolding the pops. Fill the molds about 3/4 full to allow for expansion during freezing. Pro tip: Leave a little space at the top to make it easier to remove the pops.
Mistake 2: Not Using Room Temperature Yogurt
Using cold yogurt can result in a lumpy texture. Let the yogurt come to room temperature before mixing. This ensures a smooth and creamy base for your popsicles. Pro tip: Stir the yogurt gently to incorporate any whey that may have separated.
Mistake 3: Impatient Freezing
Impatience can ruin your pops. Make sure to freeze the Berry Yogurt Popsicles for at least 4-6 hours, or overnight. Shorter freezing times can result in partially frozen, mushy pops. Pro tip: Use a timer to keep track of the freezing time.
Mistake 4: Hard Taps for Unmolding
Don’t tap the molds too hard when trying to release the pops. Gently run the molds under warm water for a few seconds, then give them a light tap. This method helps the pops release easily without breaking. Pro tip: Use a silicone mold for easier unmolding.
Mistake 5: Ignoring the Importance of Fresh Ingredients
Using stale or overripe berries can affect the flavor and texture of your pops. Always use fresh, high-quality ingredients for the best results. Pro tip: Taste the berries before adding them to the mix to ensure they are at their peak flavor.
FAQ: Frequently Asked Questions
Can I use any type of yogurt?
Yes, you can use any type of yogurt, but Greek yogurt is recommended for its thickness and creaminess. Regular yogurt works well too, but it might be a bit thinner. You can also use non-dairy yogurts for a vegan option.
Can I use frozen berries?
Absolutely! Frozen berries work great in this recipe. Just make sure to thaw them slightly and pat them dry before adding them to the yogurt mixture. This will help prevent excess water from diluting the popsicles.
How long do these popsicles last in the freezer?
The Berry Yogurt Popsicles can last up to 2 months in the freezer. To keep them fresh, store them in an airtight container or wrap them individually in plastic wrap or aluminum foil. This way, you can enjoy them whenever you want a cool, refreshing treat.
Can I add other fruits besides berries?
Yes, you can get creative with the fruits. Try using chopped peaches, mangoes, or even kiwi. Just make sure to chop the fruits into small, bite-sized pieces to ensure a smooth texture and easy unmolding.
Are these popsicles kid-friendly?
Definitely! These Berry Yogurt Popsicles are a big hit with kids. They are not only delicious but also a healthier alternative to store-bought popsicles. Plus, kids love helping in the kitchen, so they can help layer the yogurt and berries in the molds.
Can I make these popsicles dairy-free?
Yes, you can make these popsicles dairy-free by using coconut yogurt or any other non-dairy yogurt. Just make sure to choose a unsweetened variety and adjust the sweetener to your taste. The texture will still be creamy and delicious.
Do I need special equipment to make these popsicles?
You’ll need popsicle molds, which are readily available at most kitchen stores or online. If you don’t have molds, you can use small cups or ice cube trays. Just cover the top with aluminum foil and poke the popsicle sticks through the foil to keep them in place.
Can I add nuts or seeds for extra crunch?
Absolutely! Adding finely chopped nuts or seeds like chia or hemp seeds can add a nice crunch and boost the nutritional value. Just sprinkle them in between the layers of yogurt and berries. This will give your popsicles a textural element that’s both fun and flavorful.
How do I make the popsicles sweeter?
If you prefer your popsicles a bit sweeter, you can add more honey or maple syrup to the yogurt mixture. Start with a small amount and taste as you go. You can also add a pinch of sugar or a drizzle of agave nectar for extra sweetness.
Can I make a big batch of these popsicles?
Yes, you can definitely make a big batch. Simply double or triple the recipe and use additional molds. This is perfect for parties or if you want to stock up for the week. Just make sure you have enough freezer space to accommodate all the molds.
These Berry Yogurt Popsicles are a fantastic way to stay cool and enjoy a healthy, delicious treat. Whether you’re making them for a summer gathering or a simple afternoon snack, they’re sure to be a hit. For more delightful and nutritious recipes, explore our Desserts category. Happy cooking!
Berry Yogurt Popsicles
Ingredients
Equipment
Method
- In a large mixing bowl, combine Greek yogurt, honey, and vanilla extract. Whisk until smooth and creamy.
- Rinse your choice of berries under cold water and pat dry. Remove tops and chop strawberries into small pieces if using.
- Layer the yogurt mixture and berries into popsicle molds, alternating between yogurt and berries.
- Insert popsicle sticks into molds and freeze for at least 4-6 hours, or overnight.